 International
 Singapore
 Malaysia
 Thailand
 Vietnam
Không có sản phẩm trong giỏ hàng!

Stressberry Test on Raspberry Pi 4
- Hairil Mutalib
- 18 Nov 2021
- Tutorial
- 1567
Disclaimer:
This guide is provided for information and as it is. Cytron Technologies will not be responsible for any damage or data lost during the installation process. Do backup your microSD card if you have any concern.
Hardware:
- Raspberry Pi 4 Model B 2GB // Any RAM size such as 1GB, 4GB and 8GB should be no problem
- 15W Power Adapter with USB-C wire cable
- 32GB MakerDisk MicroSD Preloaded with Raspberry Pi OS
- USB microSD card Reader/Writer
- Any type of enclosures that suit with the Raspberry Pi 4
First of all, why subject your Raspberry Pi to this level of stress? In the case of Raspberry Pi 4, the A72 CPU is so powerful that it can overheat if it doesn't have enough cooling. This results with the CPU being governed (slowed down) to reduce the electrical energy being consumed, and in turn, reducing heat generation. The RPi 3B+ and predecessors could also overheat, however, it was less of a problem for the majority of use cases. A quick stress test, in this case, will reveal if your Raspberry Pi 4 can run at full CPU-load in its case/environment without overheating and not slowing down.
The goal of this tutorial is to create a chart which depicts:
- A stabilization period at the beginning
- A period of time for full-load CPU
- View the CPU temperature
- View the CPU speed (to witness if the CPU is being governed, or not)
There are a million ways to cool down your Raspberry Pi: Small heat sinks, specific cases, and some extreme DIY solutions. Stressberry is a package for testing the core temperature under different loads, and it produces nice plots which can easily be compared.
The run lets the CPU idle for a bit, then stresses it with maximum load for 30 minutes, and lets it cool down afterwards. The entire process takes around 45 minutes. The resulting data is displayed to a screen or, if specified, written to a PNG file.
Step 1: Accessing the Raspberry Pi using SSH and VNC
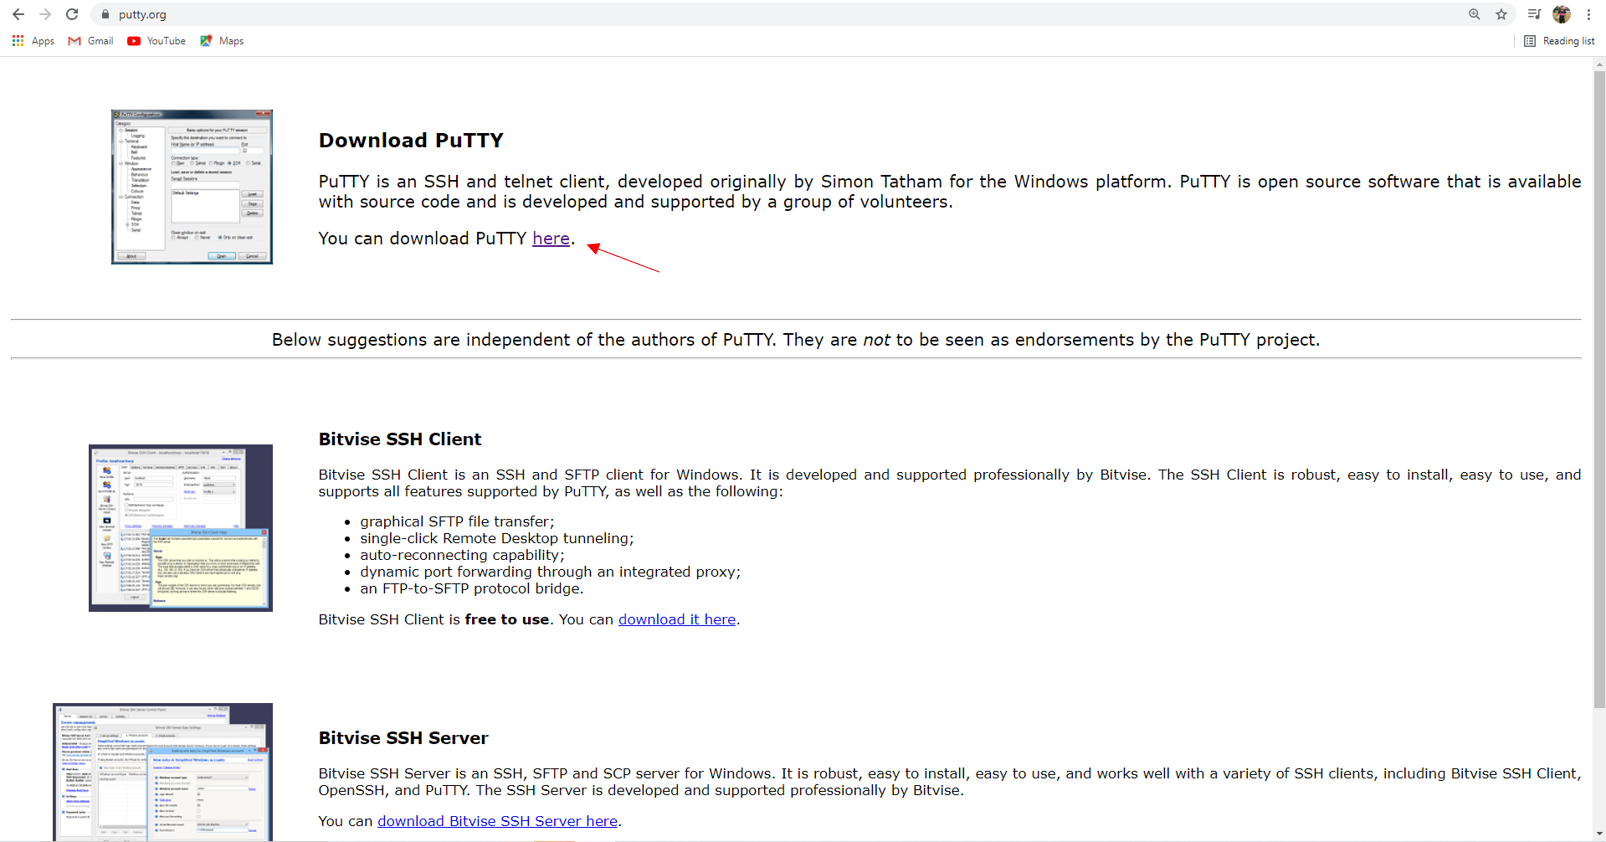
Now on your laptop or computer, you must use a tool to login to Raspberry Pi via SSH. I am using PuTTY. You can use other tools such as Powershell or VScode. You can download from the links if there is none available.
Make sure that your laptop and the Raspberry Pi are connecting to the same Wi-Fi connection. You can use an IP Scanner to scan the potential IP address of your Raspberry Pi. Since I have configured the IP address of my Raspberry Pi, I will use that in PuTTY to create a connection.

Put the IP address into Putty and click “Open”. It is suggested for you to save the session so that you can just load the previous session after this.
If the Raspberry Pi has connected to the Wi-Fi network successfully, and the IP address is correct, you should be prompted with a Security Alert, first time only.
Click YES to proceed.
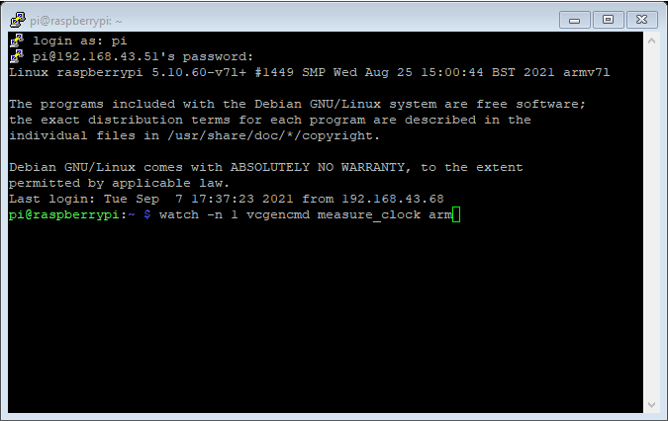
Key-in “pi” for the username and enter “raspberry” as the password for SSH. You will recognize that when typing the password, there is no cursor moving. Don’t worry it's just a privacy matter, just type your password and hit enter.
You are now logged into the Terminal of the Raspberry Pi remotely via SSH. Meanwhile, since there is an IP address, you can now login to the Raspbian desktop via VNC.
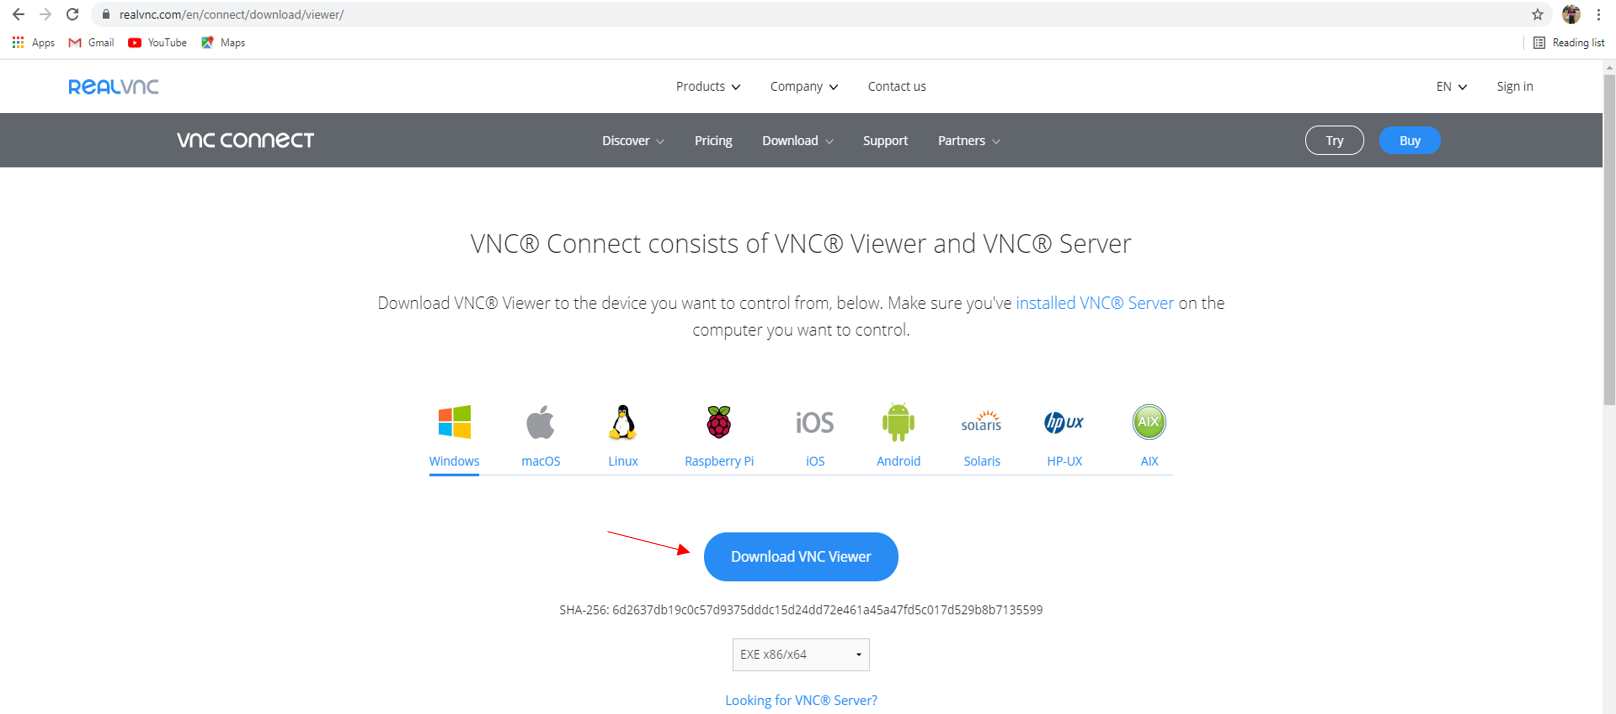
I am using the VNC Viewer to display the Raspberry Pi desktop and you can download it here. Just create an account and follow a few steps required to download the VNC Viewer.

Once you have downloaded it, open the application and go to File to create a New Connection. Put the IP address of your Raspberry Pi and the name. Then, you are good to go.
Double click on the icon of your new connection, and enter the password “raspberry” if you never change the password.
You can now control the Raspberry Pi from your computer remotely without using the HDMI cable.
Step 2: Setup the Python version
Stressberry runs under Python 3, so you may also need to make that the default version on your Raspberry Pi. The recent versions of Raspbian (the operating system for the Raspberry Pi) come with both Python 2 and Python 3, but by default Python 2 is run from the command line. You will need to change that.

First you’ll want to see what version you are running at the command line. Open a Terminal session and type
python –version
and press Enter. The current version will be printed.
If you are running Python 2 then you will need to edit the .bashrc file to change that. You can do that as follows:

- At the command line type the following:
nano ~/ .bashrc
- The Nano editor will open with the contents of the existing .bashrc file. If you get a blank file instead exit nano (Ctrl-X) and check that you spelled the previous command correctly. Make sure you typed a period at the beginning of the file name.

- Use your down-arrow key to scroll down to the bottom of the file.
- Add the following text to the bottom:
alias python=’/usr/bin/python3’
- Exit by pressing Ctrl-X. Respond yes (Y) to save the file.
- Reboot your Raspberry Pi.
You should now check the version again to ensure that you’re running Python 3.
Step 3: Updating Raspberry Pi OS
We need to update the Raspberry Pi OS.
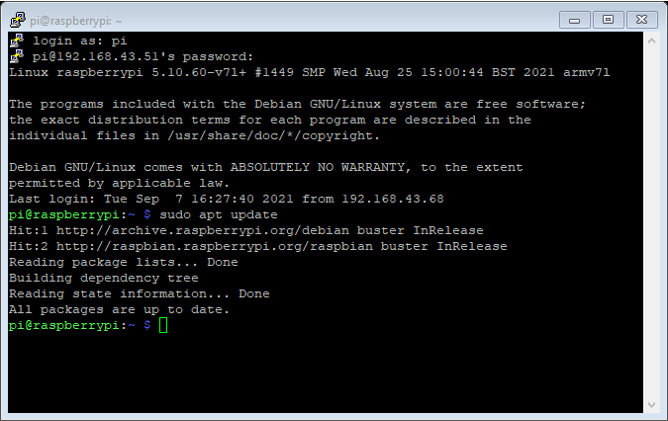
sudo apt update
sudo apt full-upgrade
Press y and Enter, for yes to proceed.

Depending on the data and internet connection speed, this process might take several minutes.
Reboot the Raspberry Pi.
sudo reboot
It might ask for the password again, just key in “raspberry” and press Enter.
Step 4: Installing the Stressberry
Installation is simple but you do need to have Python installed. I recommend using Python 3 since it is the latest version.
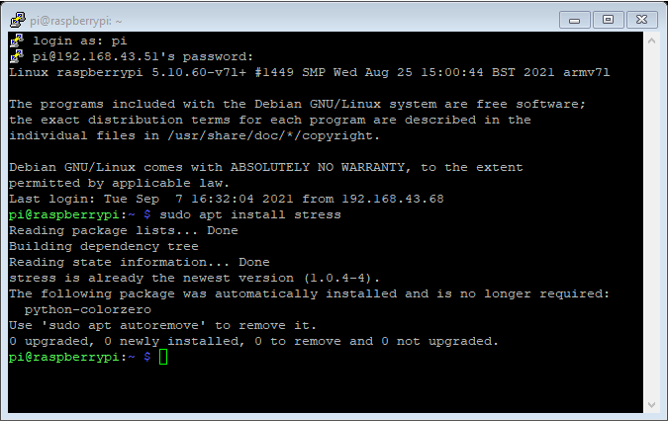
First, install the Linux package for Stress.
sudo apt install stress
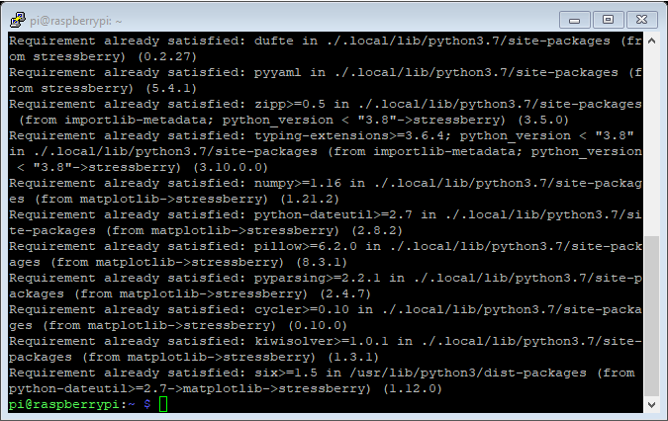
Once this is installed we can finally install Stressberry. As Stressberry is a Python package we will use PIP, the Python package manager. Since we are using Python 3 we will use PIP3.
pip3 install numpy -U
pip3 install stressberry
Type the commands above line by line and press Enter. The package will be installed. After you are finished you can reboot and you’re ready to stress-test your Raspberry Pi.
Step 5: Running the Stressberry
Using Stressberry is a two-step process. You first run a stress test that outputs a data file. You then use the plotting tool to create a chart with your results. You can use the results from multiple tests to combine them in a chart.
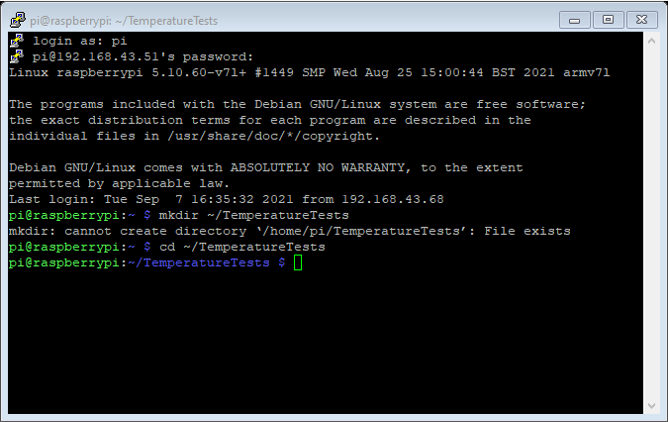
I recommend creating a folder in the home directory as you'll collect a few files and images as time goes by. In my case, I have already created the TemperatureTests file.
mkdir ~/TemperatureTests
cd ~/TemperatureTests

Use this command to begin the test.
/home/pi/.local/bin/stressberry-run -n "My Test" -d 1800 -i 300 -c 4 mytest.out
Notes: the generated file will be in the current working directory. That's why I've added the directory ~/TemperatureTests to ensure there are no surprises for unfamiliar people.
Stress Arguments
- (-n “My Test”) = I recommend this argument so you can have a label on your chart and keep track of which test you want to observe.
- (-i 300) = This argument sets how long the run idles before and after the test. I recommend 300 (5-minutes).
- (-d 1800) = This option will set how long the test will run in seconds. I recommend 1800 so you can do a standard 30-minute test.
- (-c 4) = Use all 4 cores of the Raspberry Pi.
- (mytest.out) = The filename for the collected data.

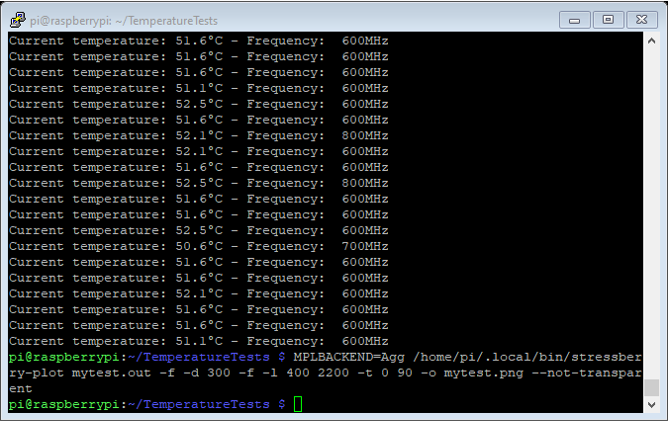
When complete, a PNG image can be generated using this command (assuming you are still in ~\TemperatureTests):
MPLBACKEND=Agg /home/pi/.local/bin/stressberry-plot mytest.out -f -d 300 -f -l 400 2200 -t 0 90 -o mytest.png --not-transparent
Plot Arguments
- (mytest.out) = file name of the source data
- (-f) = plot CPU frequency data
- (-l 400 2200) = Specify the lower and upper limits to plot frequency. I recommend 400 1600 unless you are overclocking, then I would go up to 2200.
- (--not-transparent) = This is optional but I would recommend try with and without to see which you prefer.
- (-o mytest.png) = Name of the png file you want to output your chart to.
- (-t 0 90) = Specify the lower and upper limits of temperature.
Step 6: Overclock test of the Raspberry Pi
You can overclock any model of Raspberry Pi. In fact, on newer models, you can not only turn up the Raspberry PI’s CPU speed, but also its GPU speed. You can, for example, get a Raspberry Pi 4, which defaults to 1.5 GHz CPU / 500 MHz GPU all the way up to 2.1 GHz / 750 MHz or perhaps even higher.
Before you begin the process of overclocking your Raspberry Pi, make sure that you have adequate cooling. At minimum, you should have a heat sink on the CPU and chipset, but a fan is better. Note, of course, that while unlikely, it’s also possible to damage your Pi during the process.
**Do it at your OWN risk
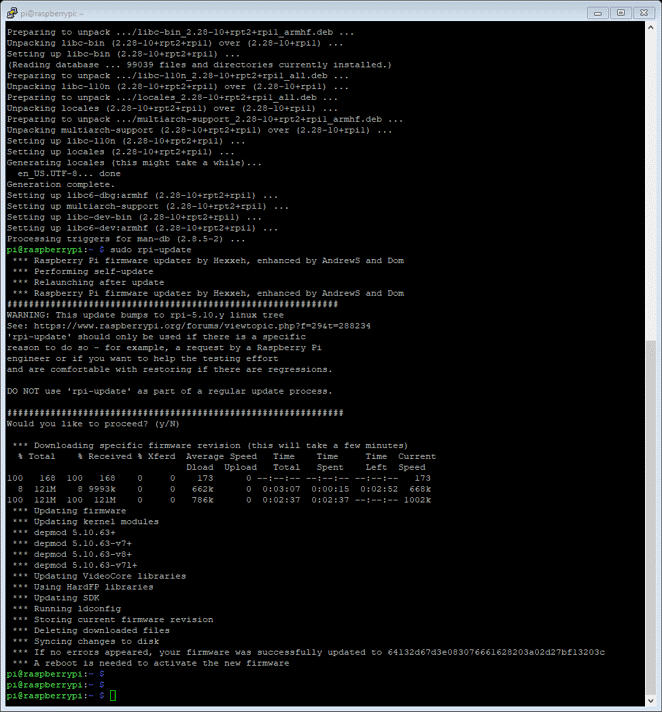
First, you need to update the latest firmware for your Raspberry Pi.
sudo rpi-update
This will takes a few minutes. Once you had finished, reboot your Raspberry Pi.
sudo reboot
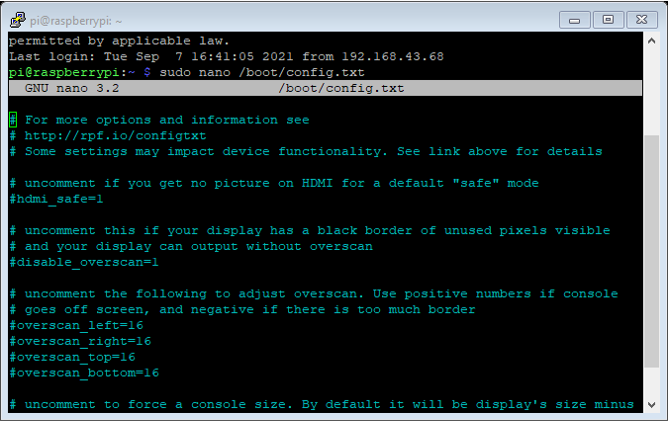
Open config.txt for editing. It’s found in the /boot directory.
sudo nano /boot/config.txt

Scroll down to the very end and insert
over_voltage=4
arm_freq=2000
gpu_freq=600
**Important: You can put on 1800 MHz first for the CPU frequency and observe the maximum temperature reached. It should not reach 80 degrees Celsius.
Save the file by pressing CTRL + X, Y then ENTER.

Now, reboot your Raspberry Pi
sudo reboot

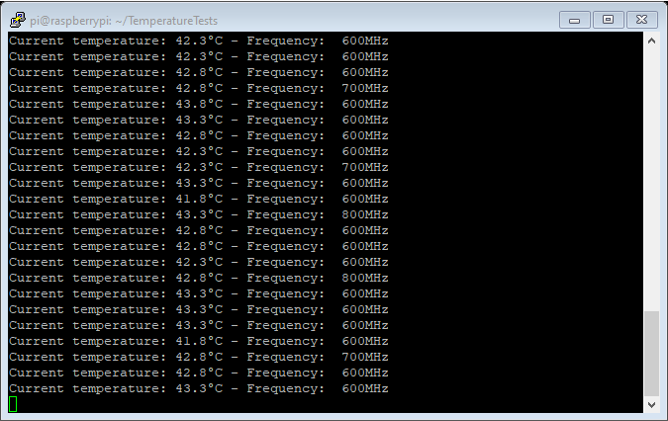
When the system starts up again, watch vcgendcmd again to see your new, faster clock speed in action.
watch -n 1 vcgencmd measure_clock arm
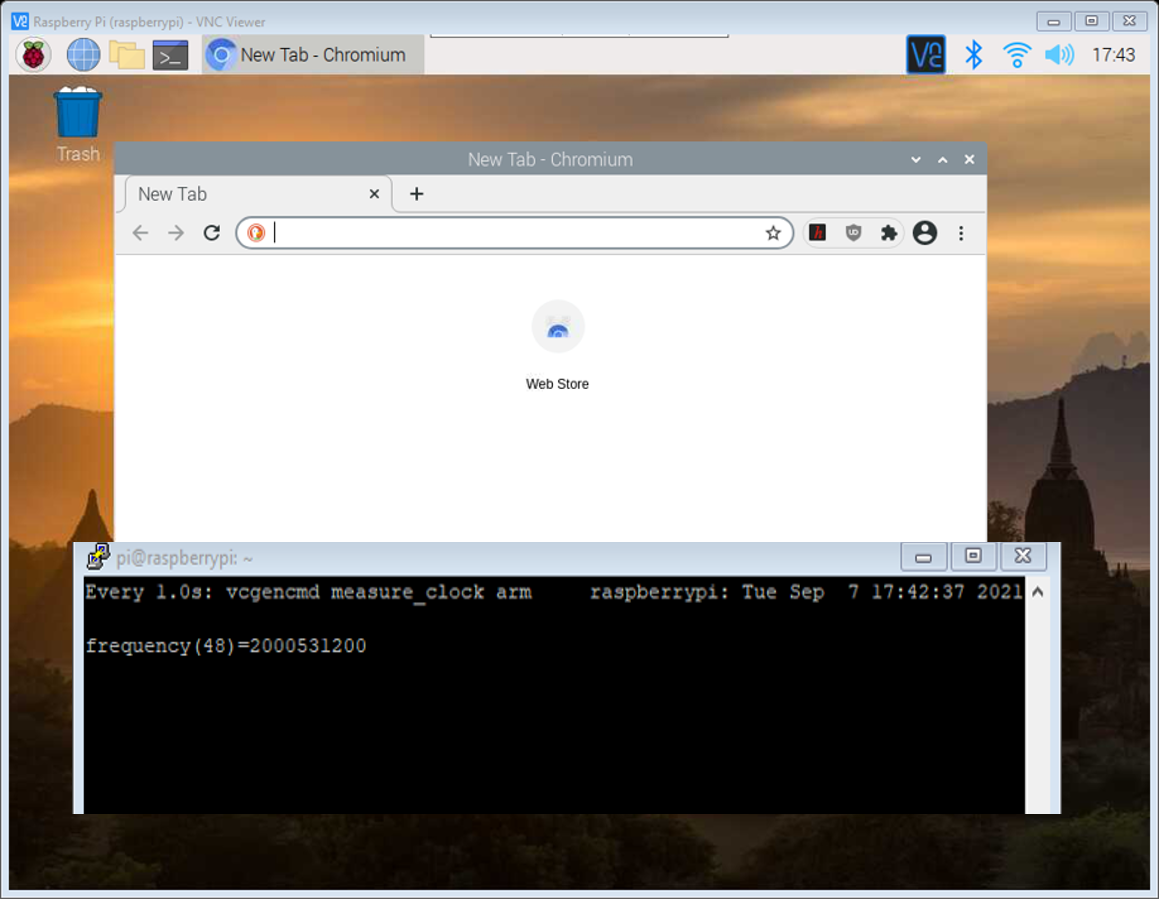
Browse a few web pages and you’ll see speeds around 2000000000 (or 2.0GHz).
You can also watch live temperature using this command.
watch -n1 vcgencmd measure_temp
Step 8: Final Result
Once you has overclocked the Raspberry Pi, run the stress test again using the same process in Step 5.
Lastly, generate the Stressberry image and you will get similar graph like the picture shown below.
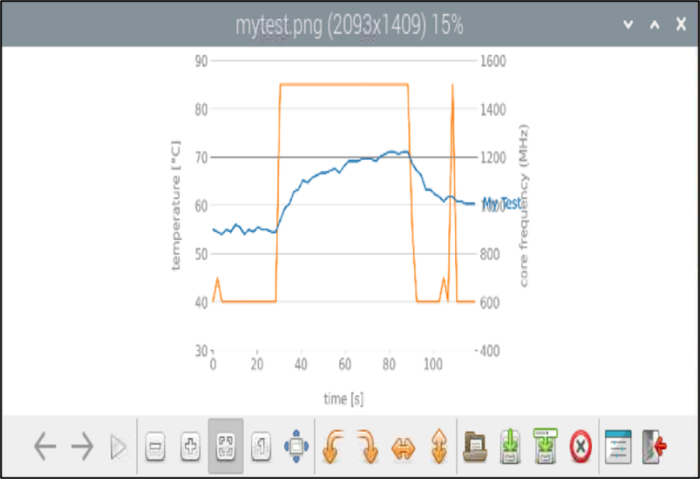
You can edit the arguments to get a better structure of graph.
Please refer other tutorials to see various results and observe how great each enclosure in Cytron can dissipate heat from the Raspberry Pi.
References
https://github.com/shortbloke/stressberry/blob/master/stressberry/cli/plot.py
https://dronebotworkshop.com/raspberry-pi-cases/
https://peakd.com/hive-163521/@themarkymark/how-to-stress-test-your-raspberry-pi
https://core-electronics.com.au/tutorials/how-to-stress-test-temperature-on-raspberry-pi.html
https://www.tomshardware.com/how-to/overclock-any-raspberry-pi
https://magpi.raspberrypi.org/articles/how-to-overclock-raspberry-pi-4