 International
 Singapore
 Malaysia
 Thailand
 Vietnam
Không có sản phẩm trong giỏ hàng!

Part 1: Simple LED Toggle with Cytron IRIV PiControl and CODESYS
- Huck Phin Ch’ng
- 29 Jul 2024
- Tutorial
- 229
This is a sample output of what we will achieve at the end of this section - the ability to toggle Cytron IRIV PiControl's LED0 on and off from CODESYS

Hardware
To complete this part of the tutorial, we will need the following hardware:
Software
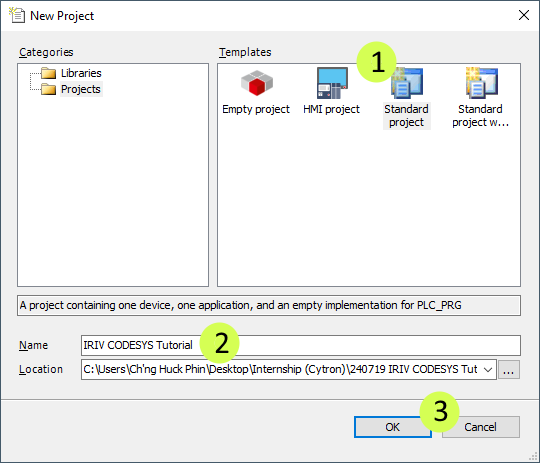
Go to File → New Project

In the new project window, select Standard Project and give a name to the project.
Let’s call this project: IRIV CODESYS Tutorial
Then click OK.
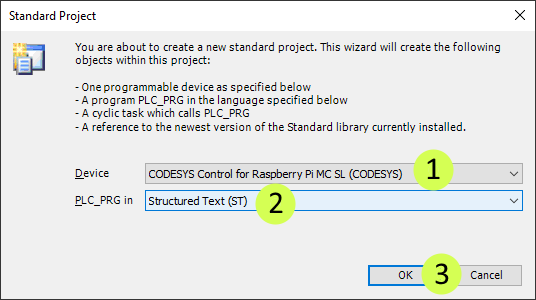
Next, for the device, based on the selection previously from the configure runtime window:
Choose "CODESYS Control for Raspberry Pi 64 SL (CODESYS)" if the configure runtime window selection was Multicore 64-bit.
Choose "CODESYS Control for Raspberry Pi MC SL (CODESYS)" if the configure runtime window selection was Multicore 32-bit.
For PLC _PRG in, choose Structured Text (ST) and click OK
A new window will open, similar to the one shown in the figure below.
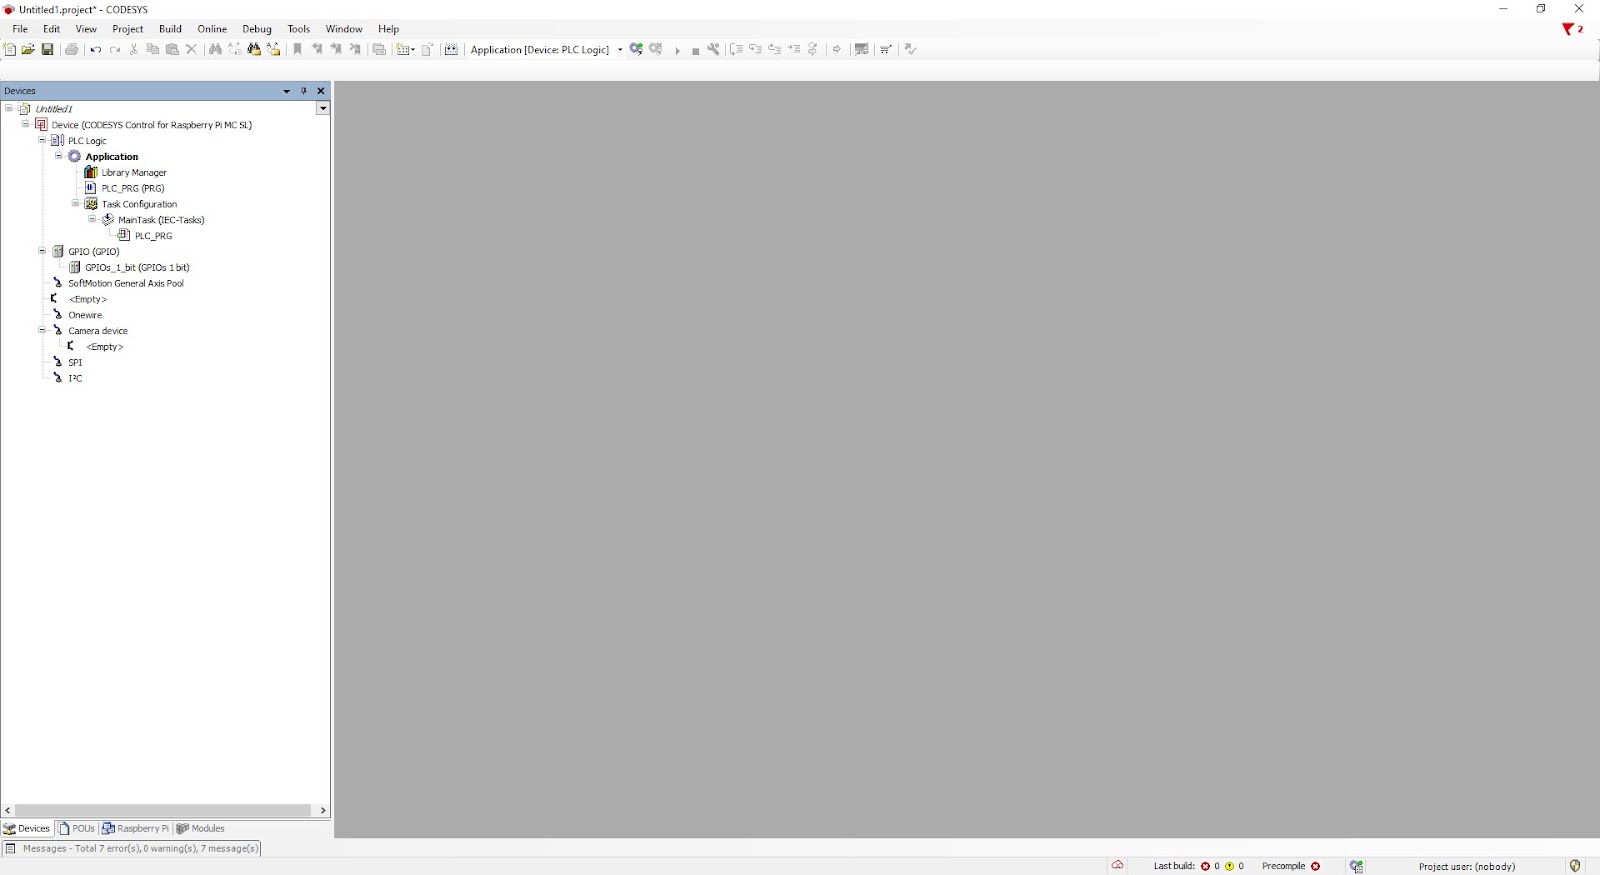
Delete the default "GPIOs_A_B(GPIOs A/B)" device as it will cause interference otherwise later.

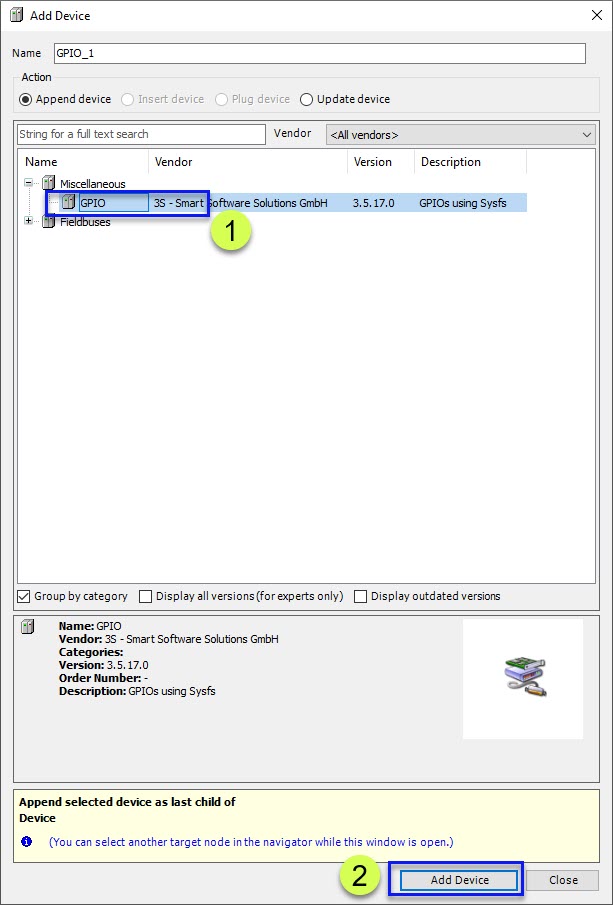
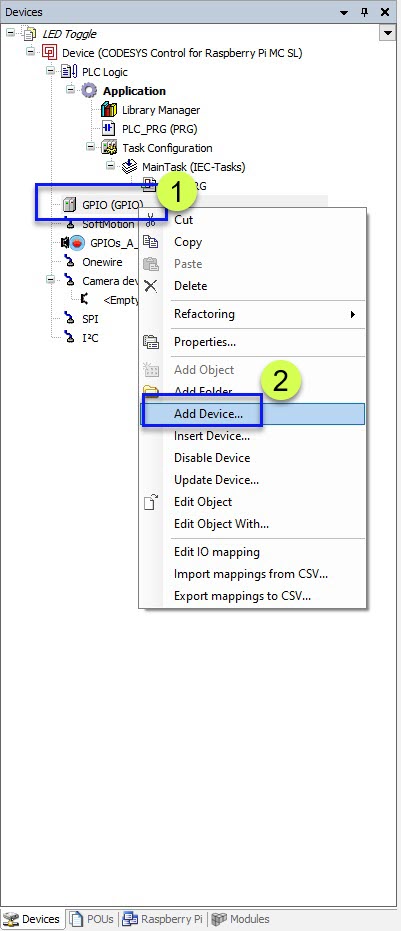
Next, we want to configure the GPIO. For this, please right-click on "Device" and choose "Add Device"

Expand Miscellaneous, choose GPIO, and click Add Device. This will add a new GPIO device in the device tab.
Right-click on the GPIO and choose Add Device.
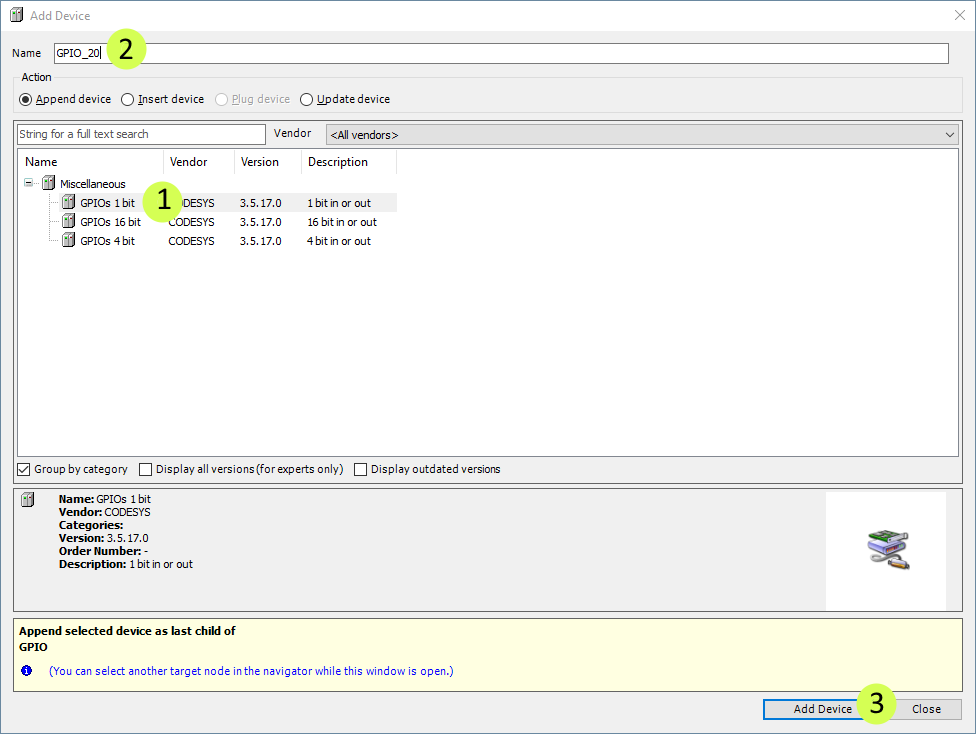
Choose GPIOs 1 Bit, enter GPIO_20 for the Name, and click Add Device.
Referring to the IRIV PiControl Datasheet, there is a user-programmable LED0, connected to GPIO 20.
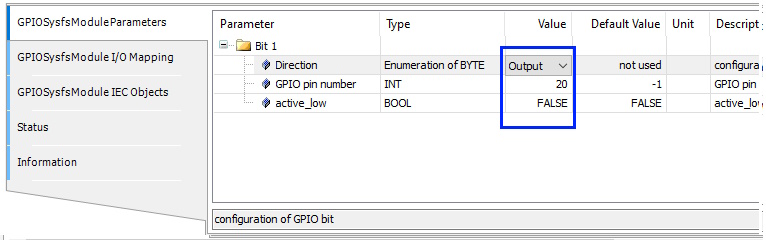
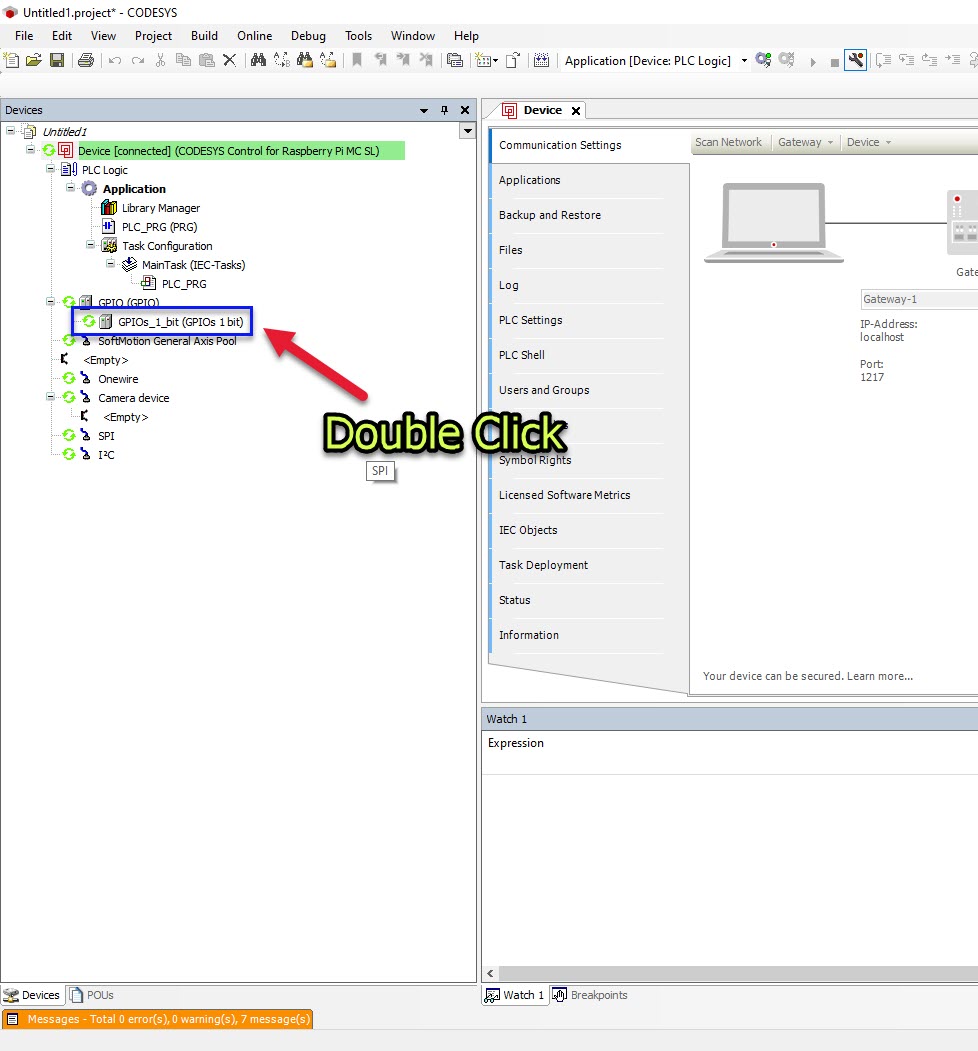
Double-click on the GPIO_20 to bring up the configuration window
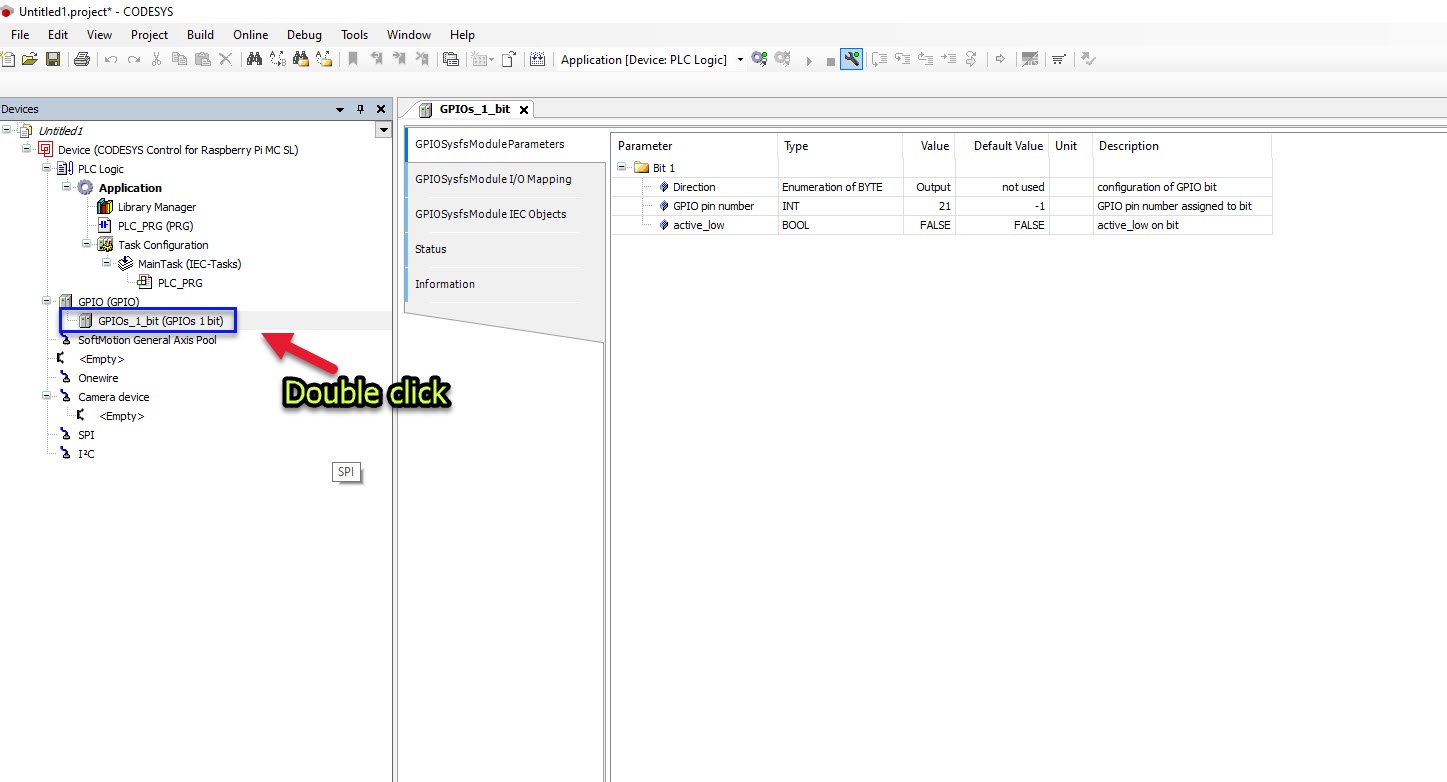
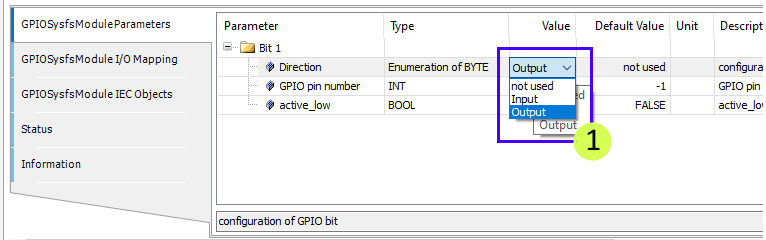
In the GPIO_20 configuration window, select the first tab “GPIOSysfsModuleParameters" to configure and assign the GPIO Direction to Output, GPIO PIN Number to 20, and current PIN state to FALSE.
Next, we want to enter the IRIV PiControl into online mode. First, we must double-click the "Device (CODESYS Control for Raspberry Pi…)".
The device configuration window will open.

In the communication settings window, click on Scan Network

Now, select IRIV PiControl under “Gateway” and then click Ok
NOTE: If your IRIV does not appear, you can try restarting your IRIV and or double-clicking on Gateway-1

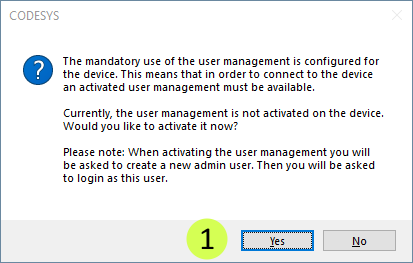
Click Yes
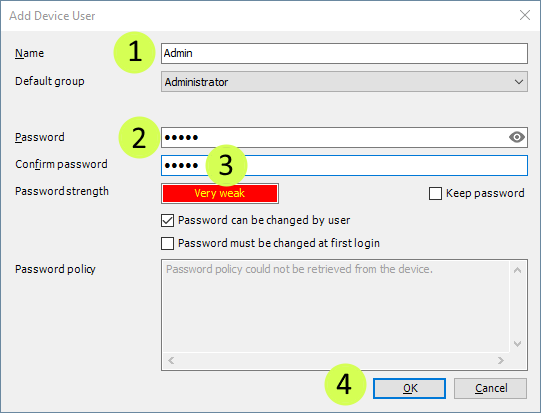
Type in Admin for the Name and admin for both Password and Confirm password. Then click OK.
NOTE: You may use other particulars for the name, password, and confirm password fields but please remember the custom particular you choose.
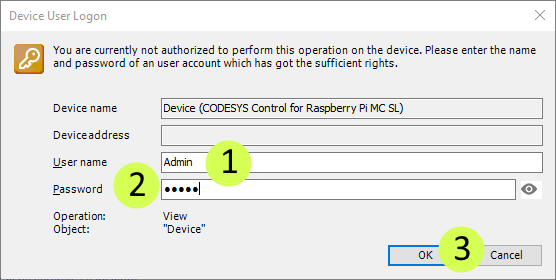
Type in Admin for the Name and admin for Password. Then click OK.
NOTE: If you used custom particulars for the name, password and confirm password earlier, use your custom particular instead.
Next, click the tool button highlighted in the figure below (online config mode), the button should turn from green to red. With this, we have connected to Cytron IRIV PiControl
This mode allows us to test input and outputs without writing a real application.

Next, double-click the GPIO_20 in the device sidebar.
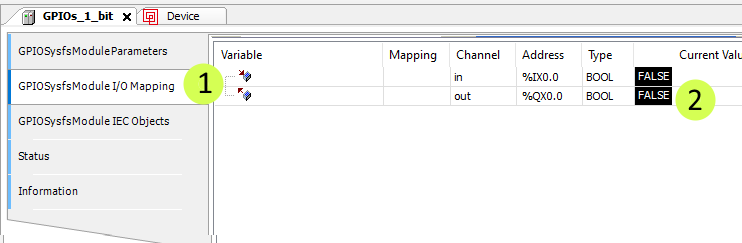
Select the GPIOSysfsModule I/O Mapping tab. Double-click on the value in the Current Value column. This will make the value toggle between TRUE and FALSE. If TRUE, LED0 will light up. If FALSE, LED0 will remain off.
Before ending, click the tool button highlighted in the figure below (online config mode) to exit out of the online config mode.
Hardware Components
 Hết hàng
IRIV PiControl - Bộ Điều Khiển Công Nghiệp IR4....
8,877,000₫++ 8,070,000₫
x 1 đơn vị