 International
 Singapore
 Malaysia
 Thailand
 Vietnam
Không có sản phẩm trong giỏ hàng!

IRIV PiControl - Controlling a 24V DC Pump
- Abdulkareem Bageri
- 02 Sep 2024
- Tutorial
- 327
Continuing to learn how to control digital input and output and controlling realy with Node-RED. this tutorial will show you how to control a 24V DC pump using a relay on IRIV.
Hardware
Connection Diagram
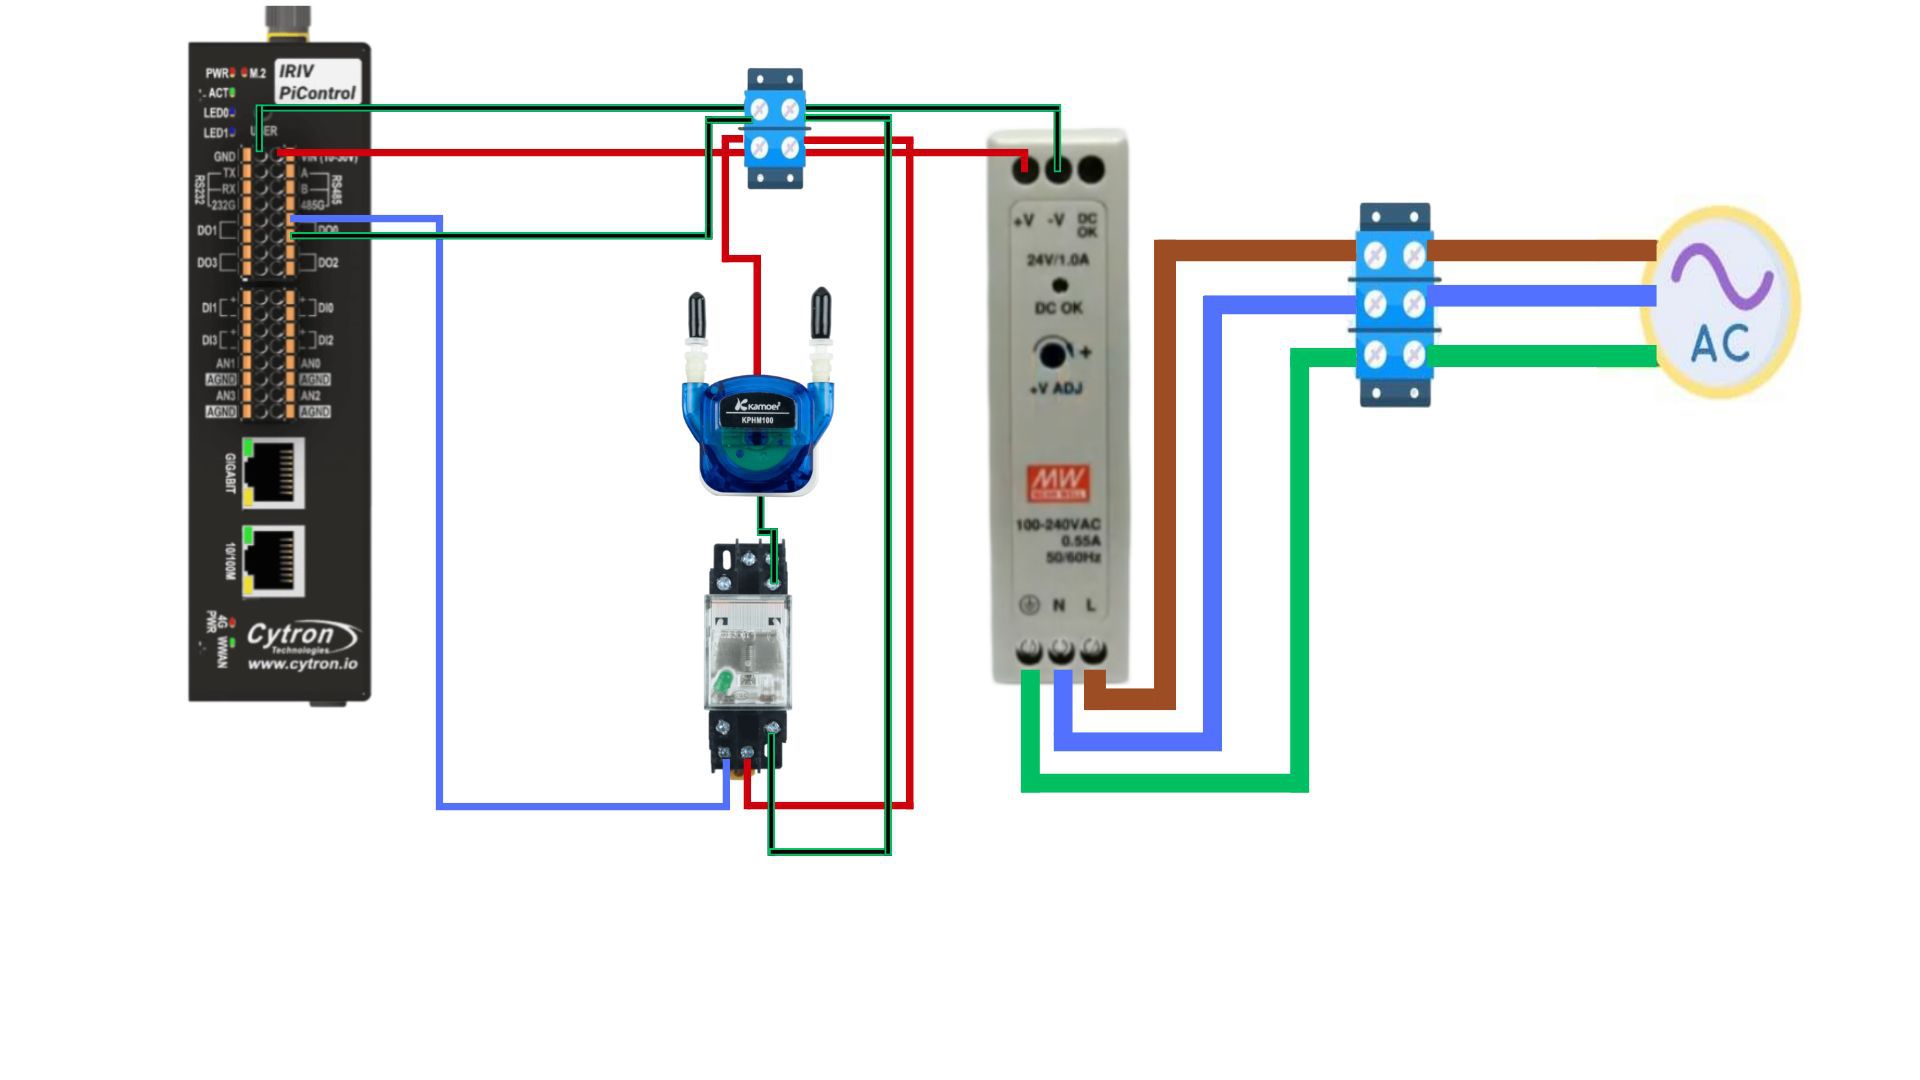
Power Supply Connection:
- Start by powering up the 24V power supply using a 120-240V AC source.
- Connect the power supply to the IRIV PiControl.
Water Pump Connection:
- Connect one end of the pump to the power supply
- connect the other end to the entance path of the relay
Relay Connection:
Since we're working with isolated digital input and output in IRIV, connect the relay as follows:
- Connect one end of the relay to the power supply.
- Connect the other end of the relay to the DO0 (digital output 0) pin on the IRIV PiControl.
- while the DC Pump is connected to the enteance path of the relay, connect the exit path to the ground
- Double-check the polarity to ensure correct connection.
Note: Please remember to handle all connections with care and double-check connections for accuracy.
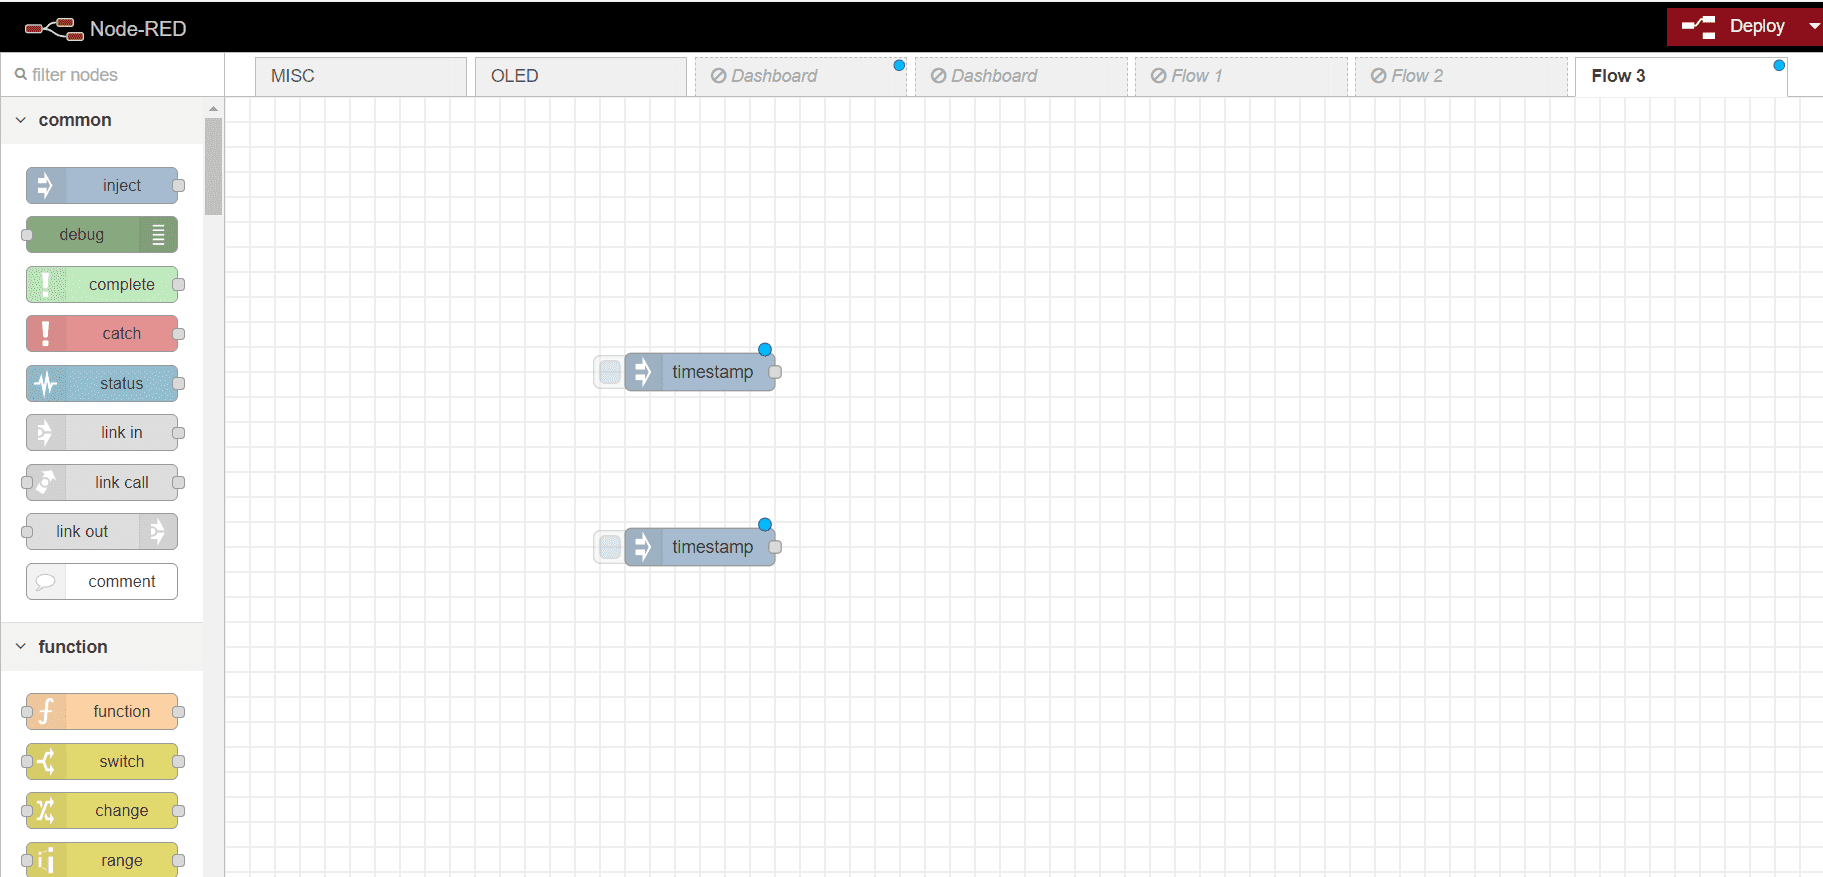
Programming with Node-RED
from the platter common group, drag two injection
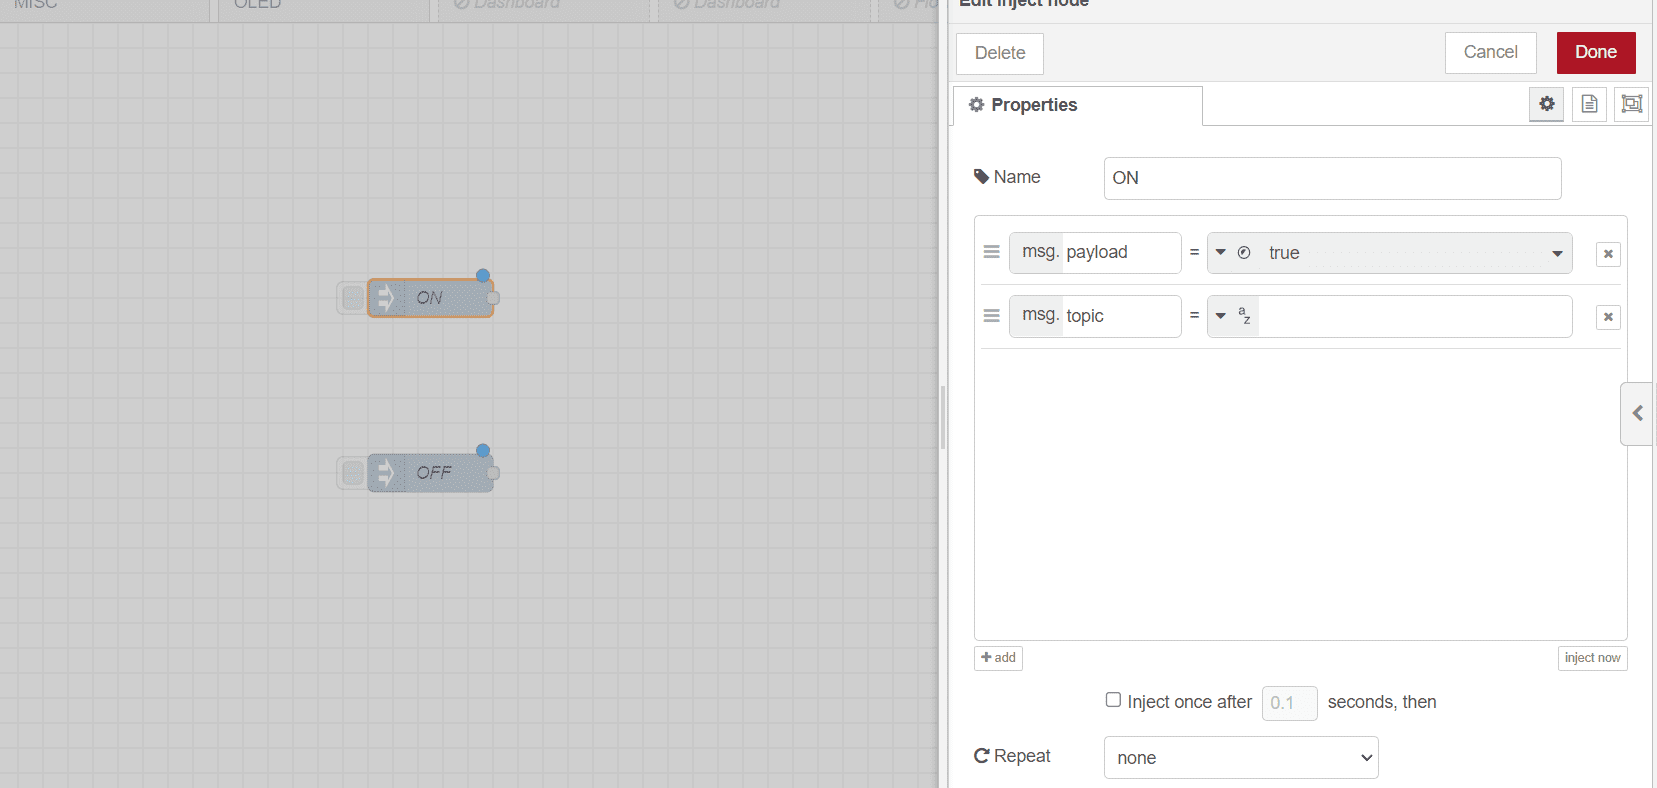
Now lets make the ON button, you can do that by double clicking on on of the injection and adjust it properties . set the msg.payload to a boolean (True) and name it "ON"
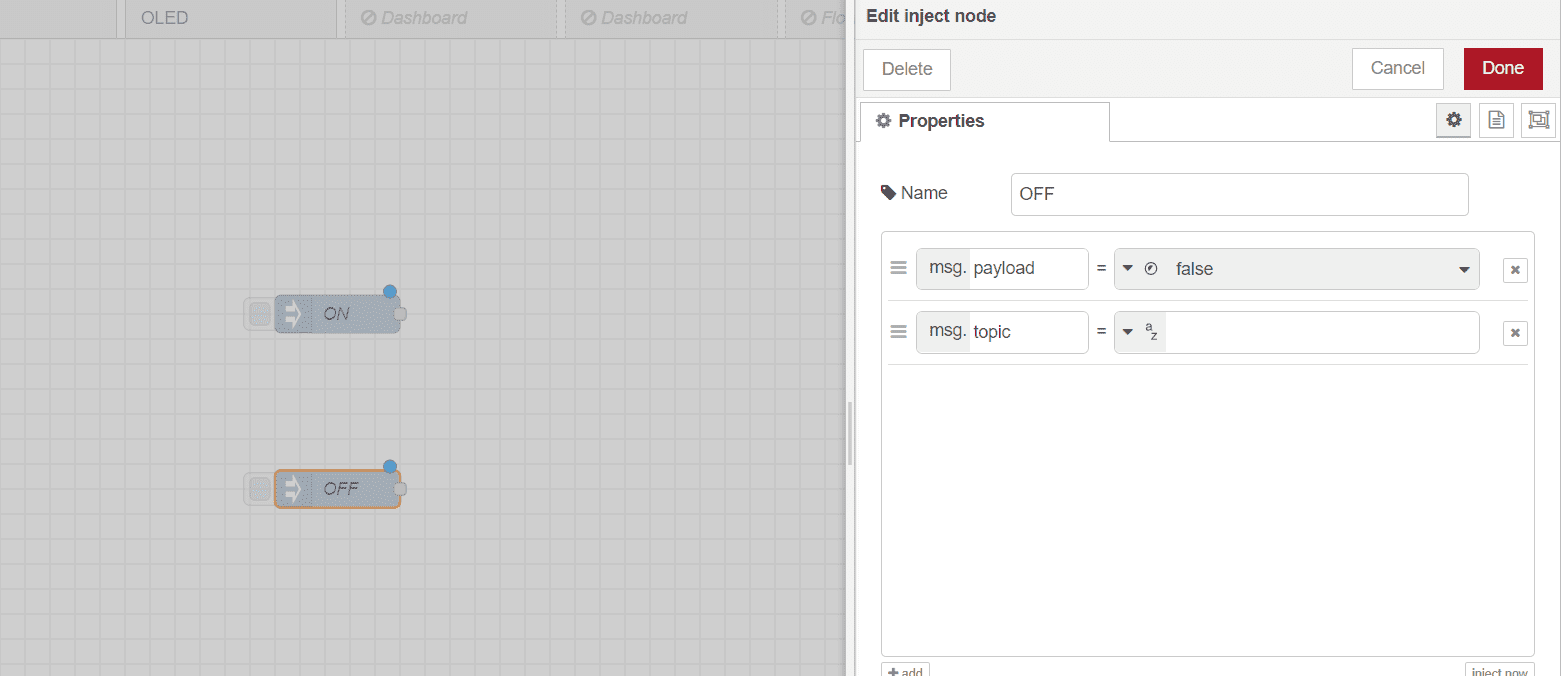
Adjust the other injection as well, set msg.payload to boolean (False) and name it OFF
Now from the platter raspberry pi groum drag rpi -gpio out node
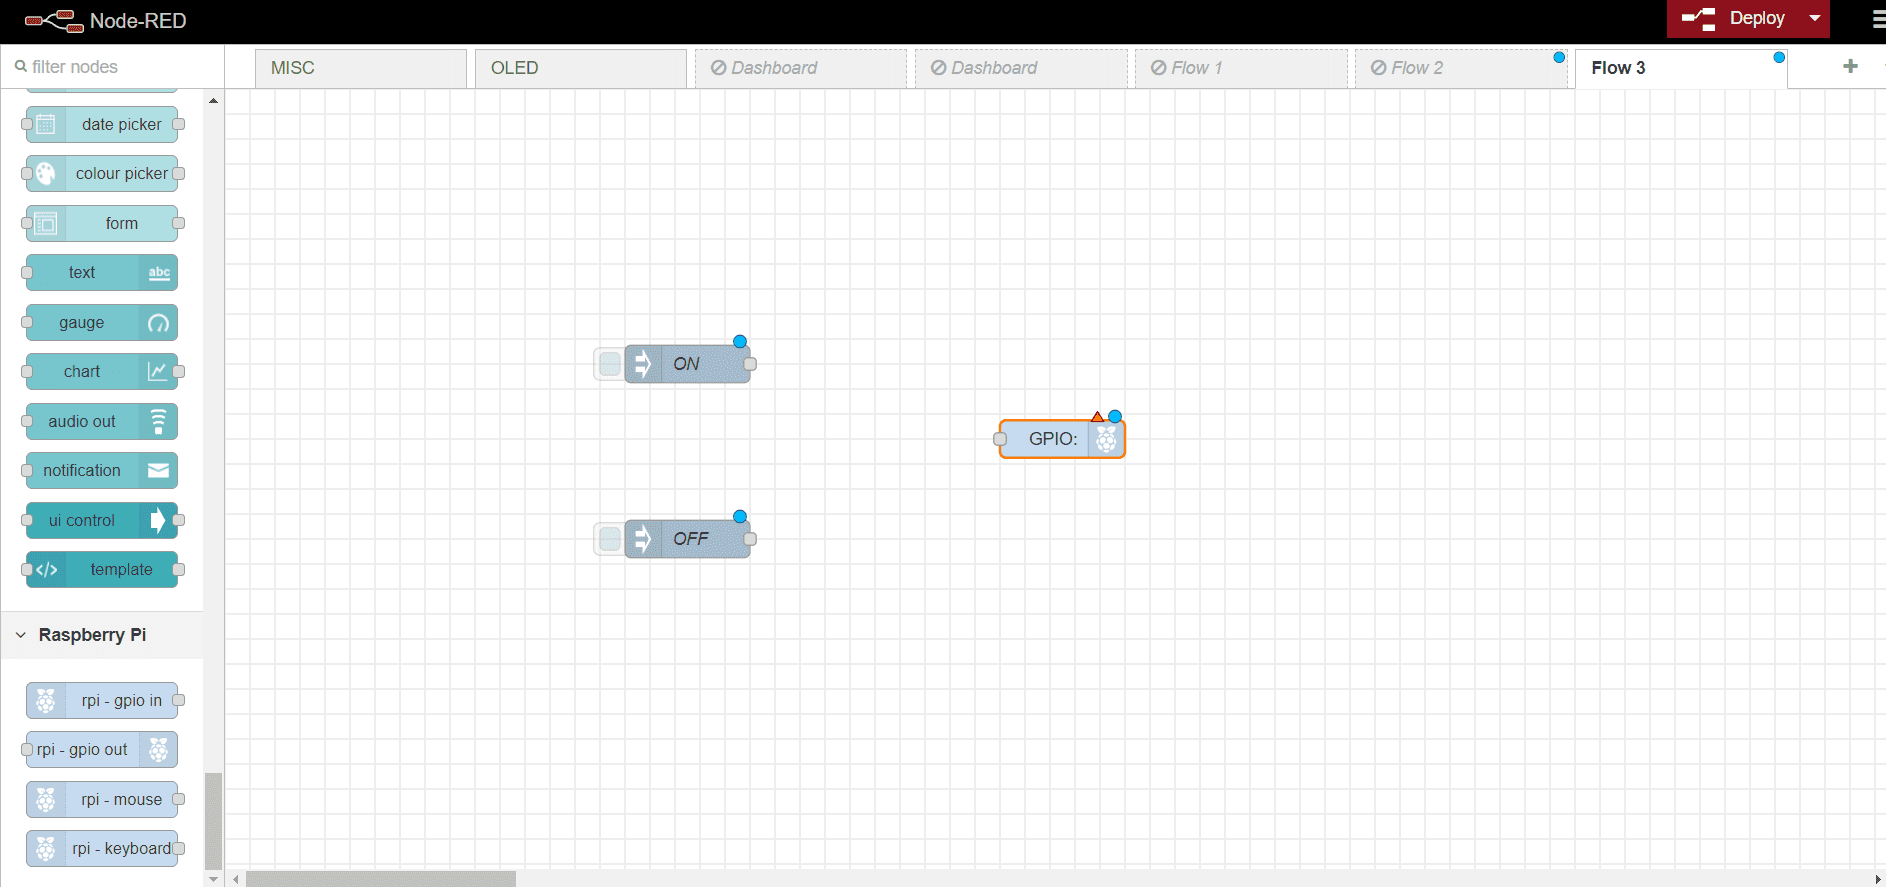
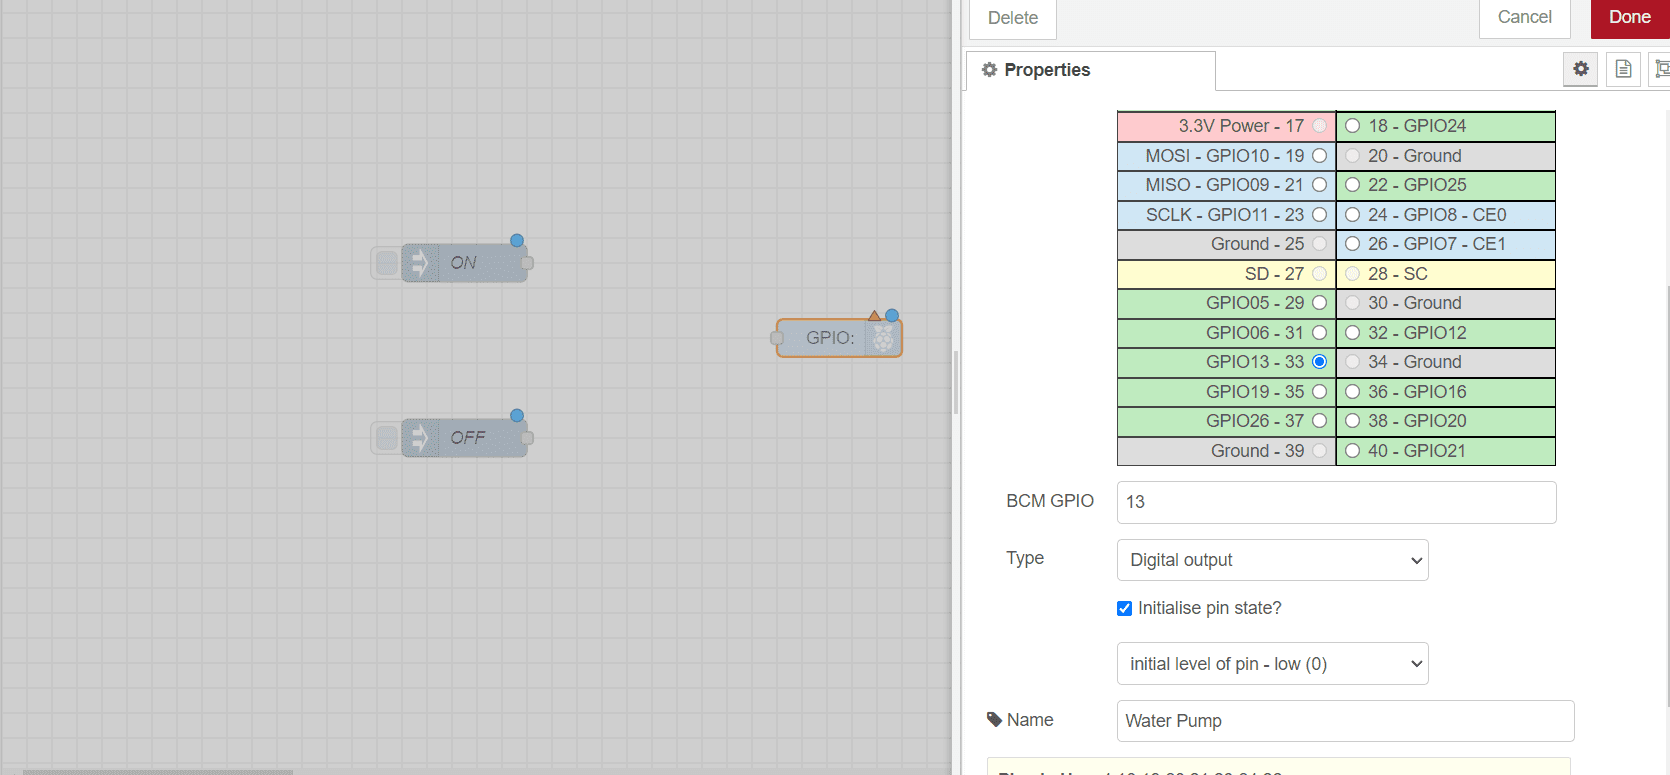
Adjus the node settings set it to GPIO13 as it controlling D0 you can refer to the datasheet for more info. initilize the pin to low(0)
Now connect the nodes as shown and deploy
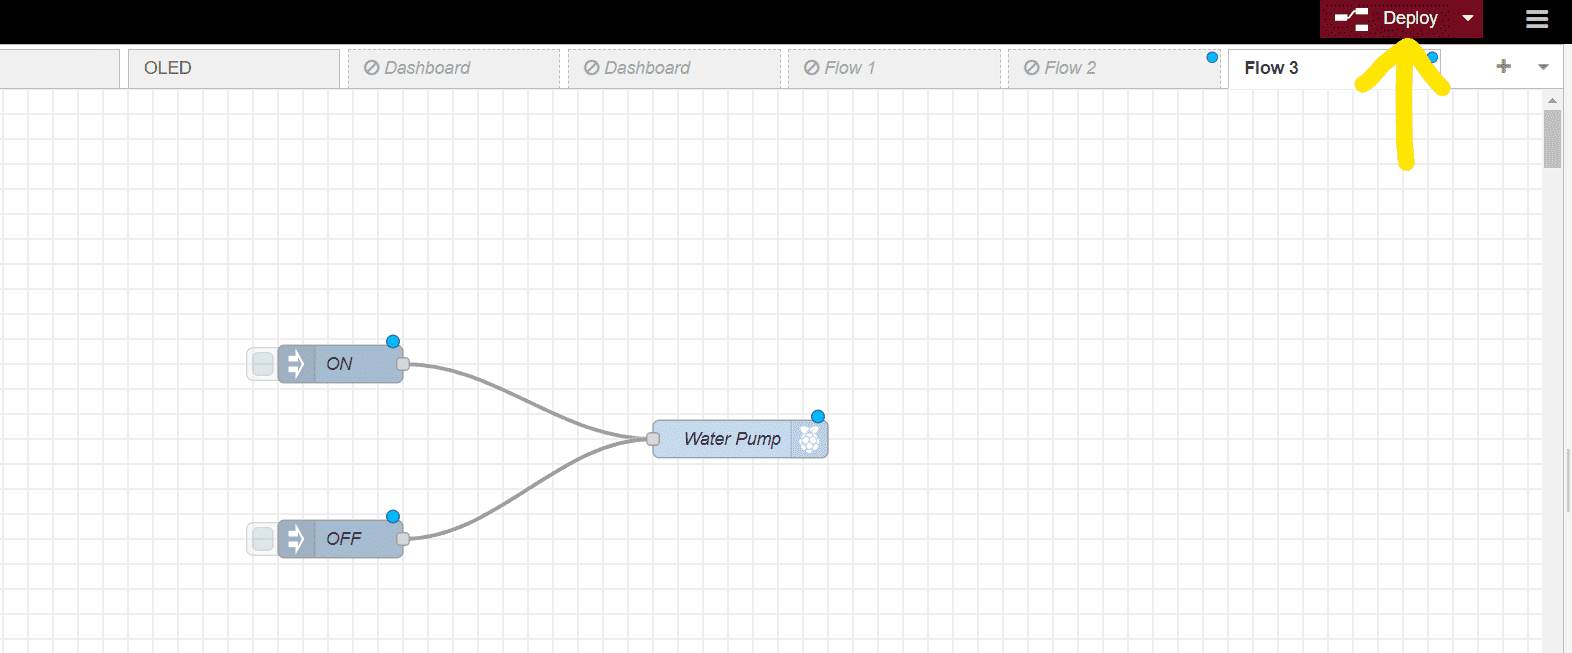
Now you can switch your pump on and off by clicking the inject