 International
 Singapore
 Malaysia
 Thailand
 Vietnam
Không có sản phẩm trong giỏ hàng!

Install and Mount NVMe SSD into IRIV PiControl
- Huck Phin Ch’ng
- 18 Jul 2024
- Tutorial
- 193
NOTE: Before starting, back up any important data from your NVMe SSD. This tutorial will involve formatting and deleting all existing data on the NVMe SSD.
Video
Hardware
We are going to start by disassembling IRIV PiControl to install the NVMe SSD.
Remove antenna

Detach the two connectors (black-orange) on IRIV PiControl.

Remove the four screws located at the side of the casing using the provided Phillips screwdriver.
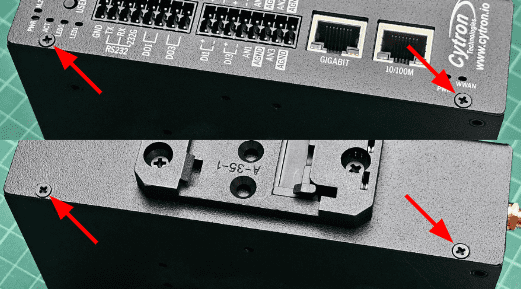
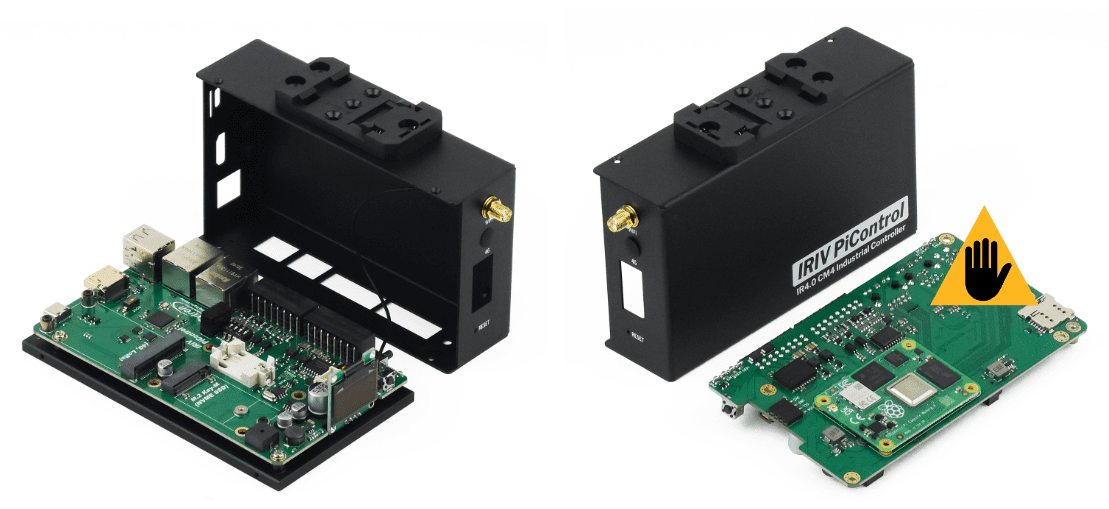
Gently separate the top casing and the bottom part from the DIN Railside.

IRIV PiControl casing is successfully open.
Warning: Avoid touching the electronic parts on the board to prevent ESD.
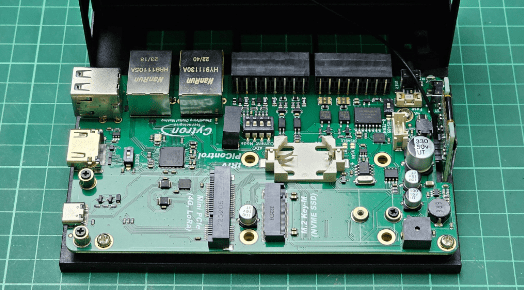
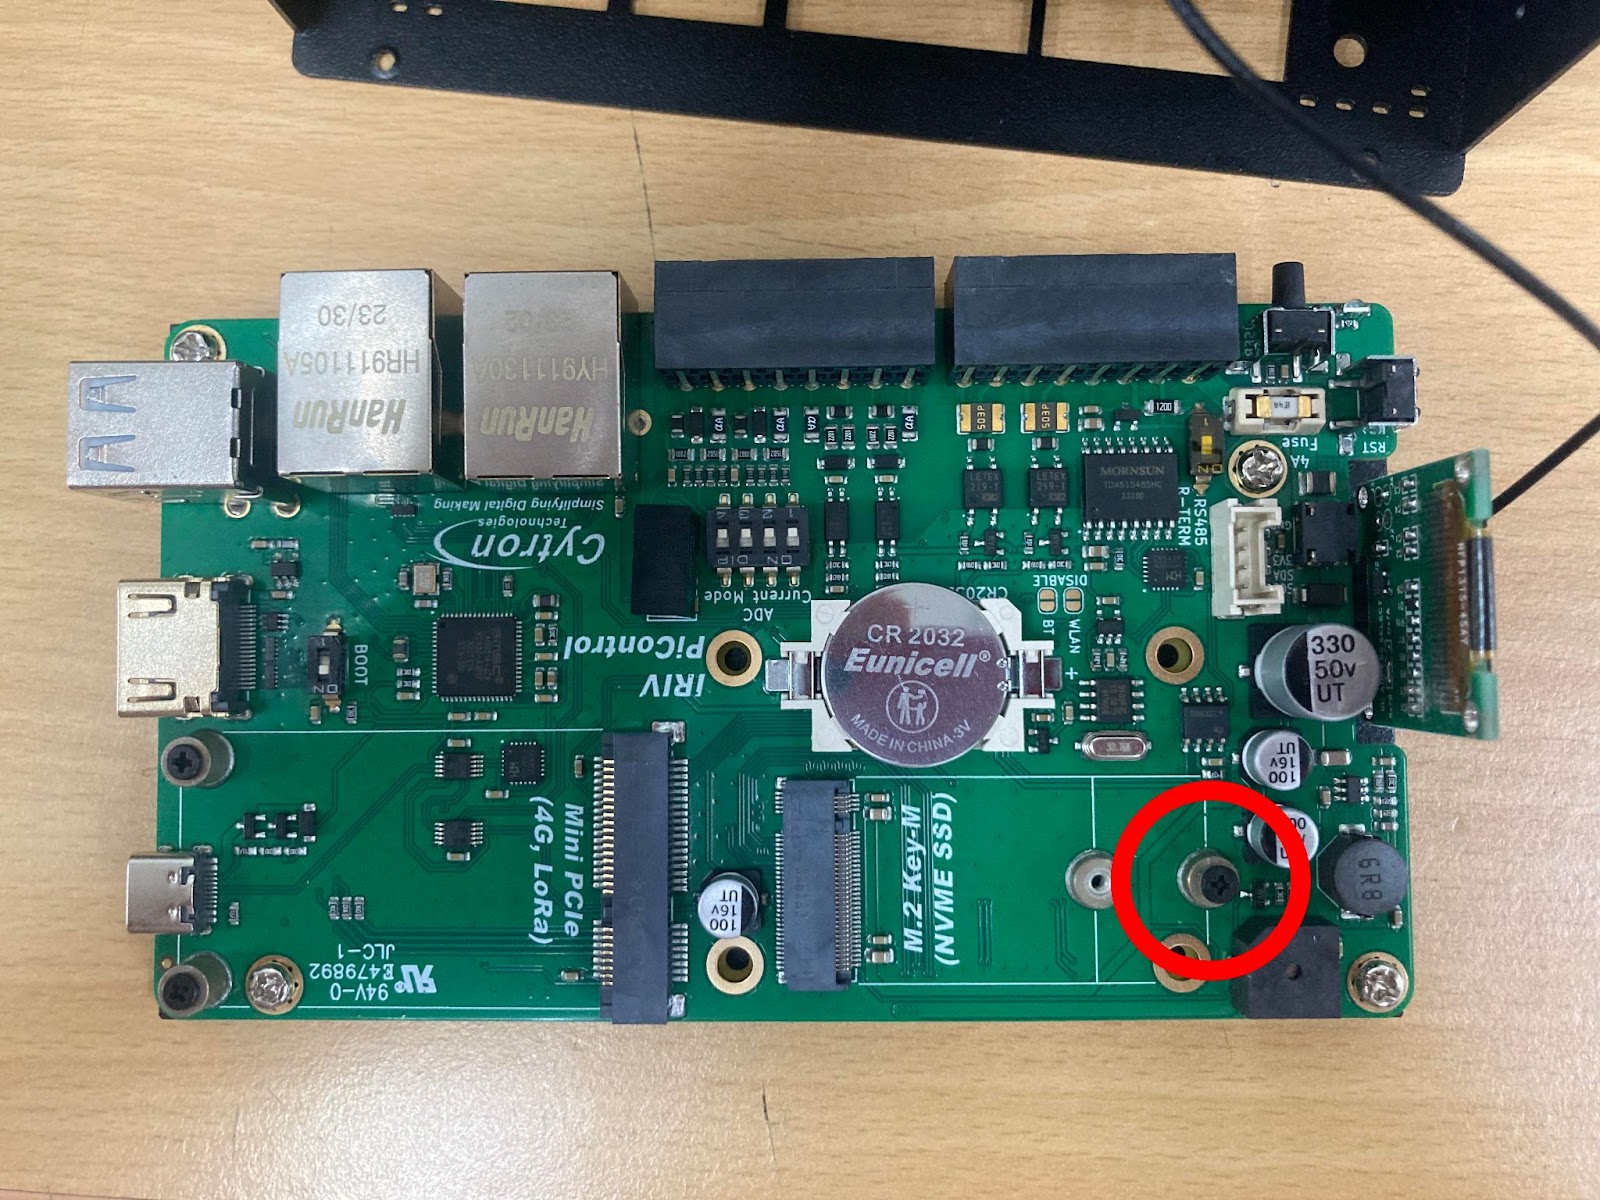
Locate the hold-down screw for the M.2 slot and unscrew the screw.
Place the NVMe SSD at a 45° angle and push the NVMe SSD into the M.2 slot.
Push the SSD down and screw back in the hold-down screw for the M.2 slot.

We will reassemble IRIV PiControl after completing the software steps.
Software
We will connect IRIV to a keyboard, mouse, and monitor for the software part.
After the IRIV has booted up, open a new terminal window.
We are first going to install a GUI program that will allow us to manage partitions on the NVMe SSD. Enter this command:
sudo apt-get install gparted -y
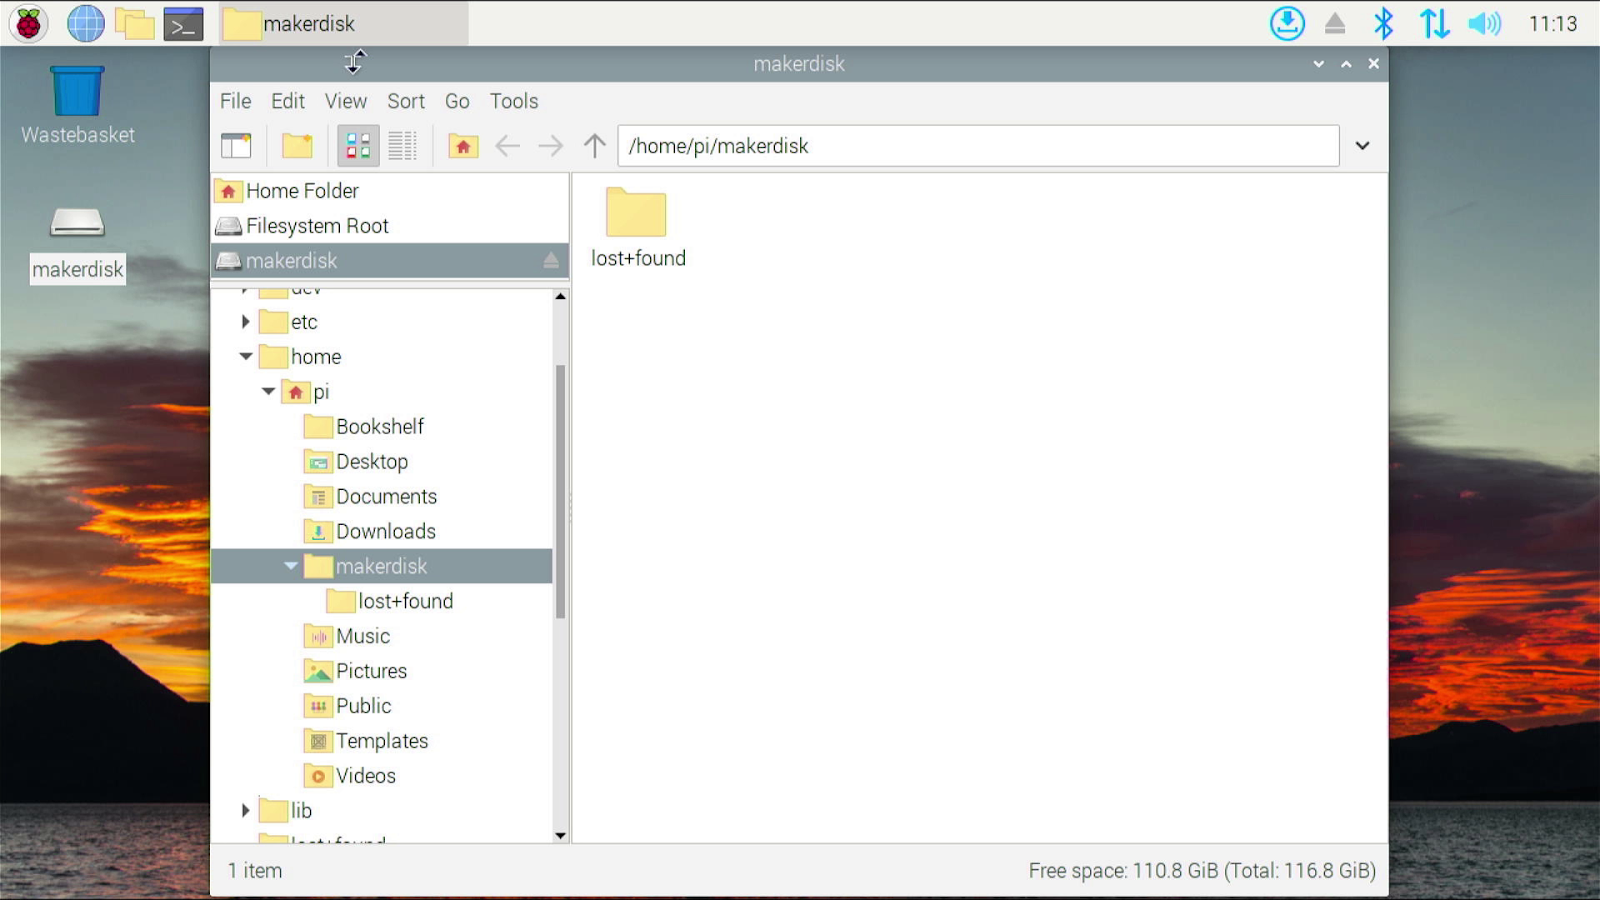
After installation, remain in the terminal. We are now going to create a new directory called makerdisk. This directory will later be used to access the NVMe SSD.
mkdir makerdisk
Next, we are going to change ownership of the MakerDisk directory and all its content
sudo chown pi:pi -R /home/pi/makerdisk/
Then we will allow read, write, and execute permissions for users, groups, and others, for the MakerDisk directory.
sudo chmod a+rwx /home/pi/makerdisk/
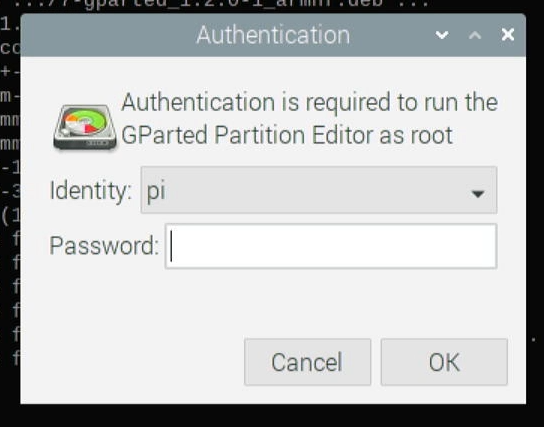
Leave the terminal window open but now launch GParted from the menu under System Tools.

Enter your password. The default password for IRIV is "raspberry".
From the drop-down in the top right corner, select the NVMe SSD. You should be able to identify it by referencing the capacity listed.

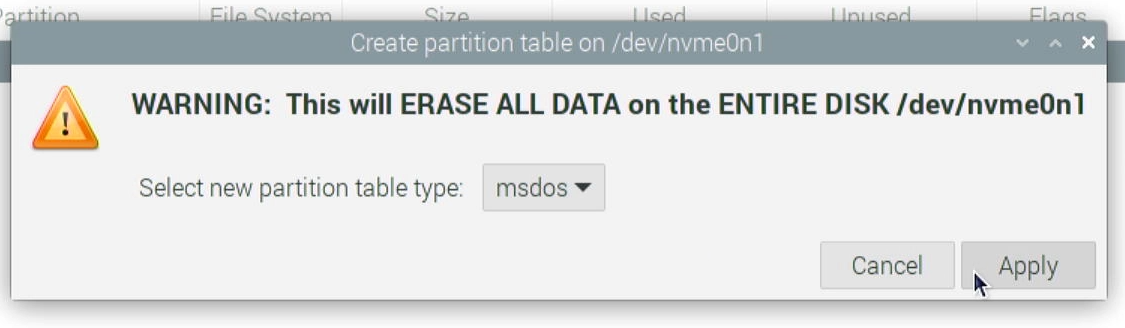
Click on the Device tab from the top menu bar and click Create Partition Table

Click Apply
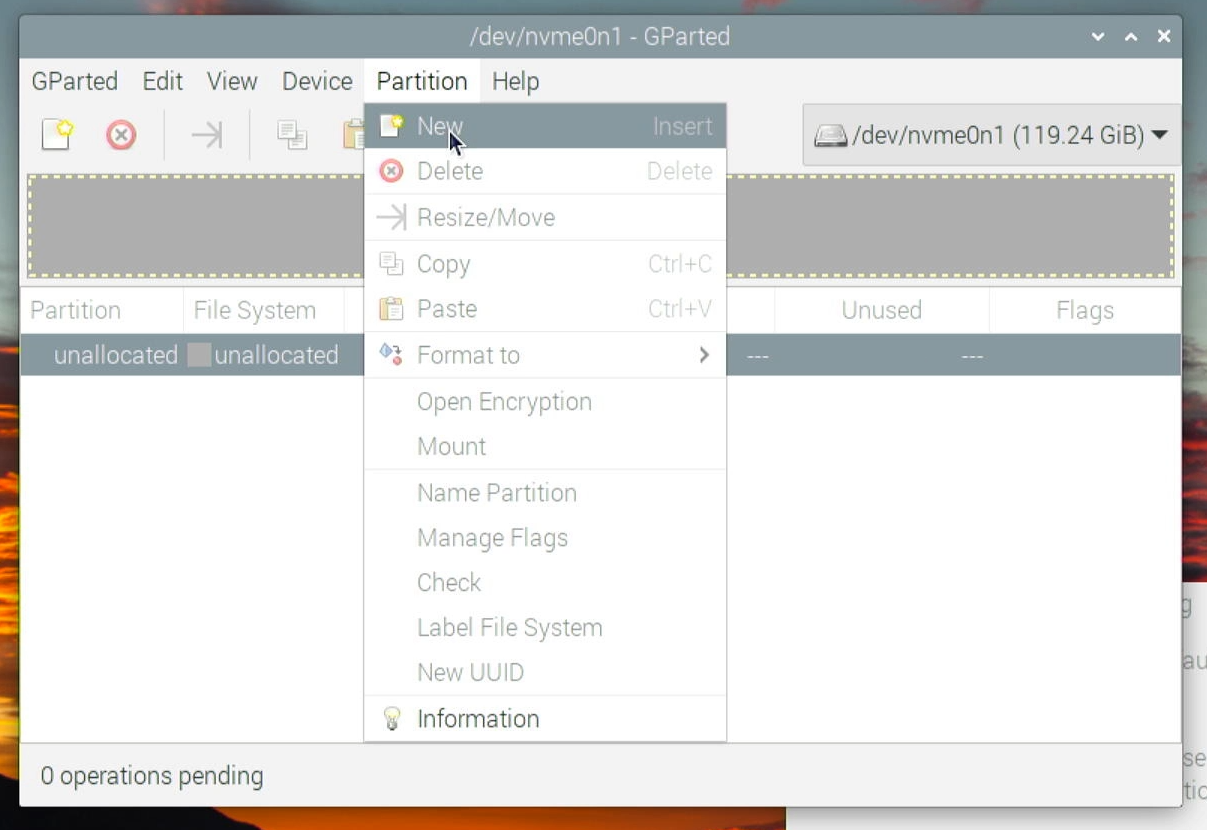
Click on the Partition tab from the top menu bar and click New
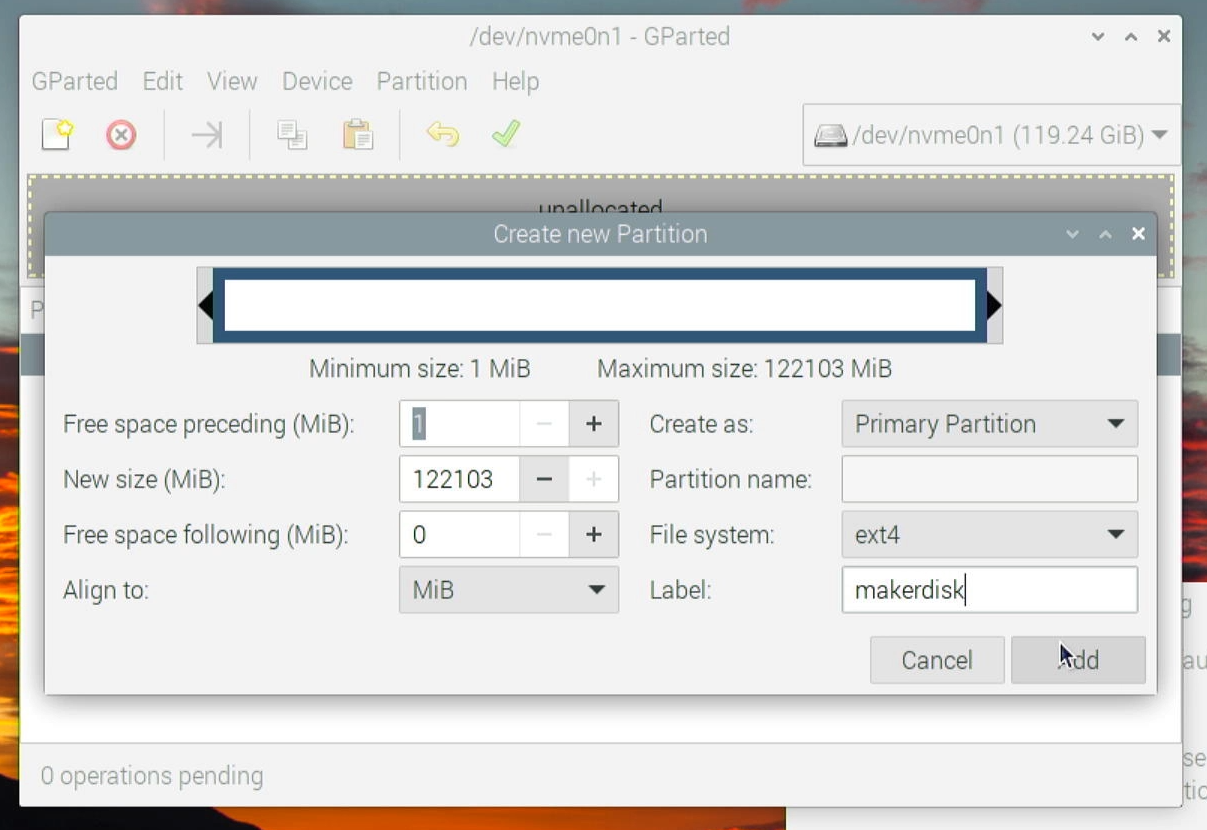
A Create new Partition window will open. We will use the default values but put makerdisk as the Label. Then click Add.
Click the green tick icon
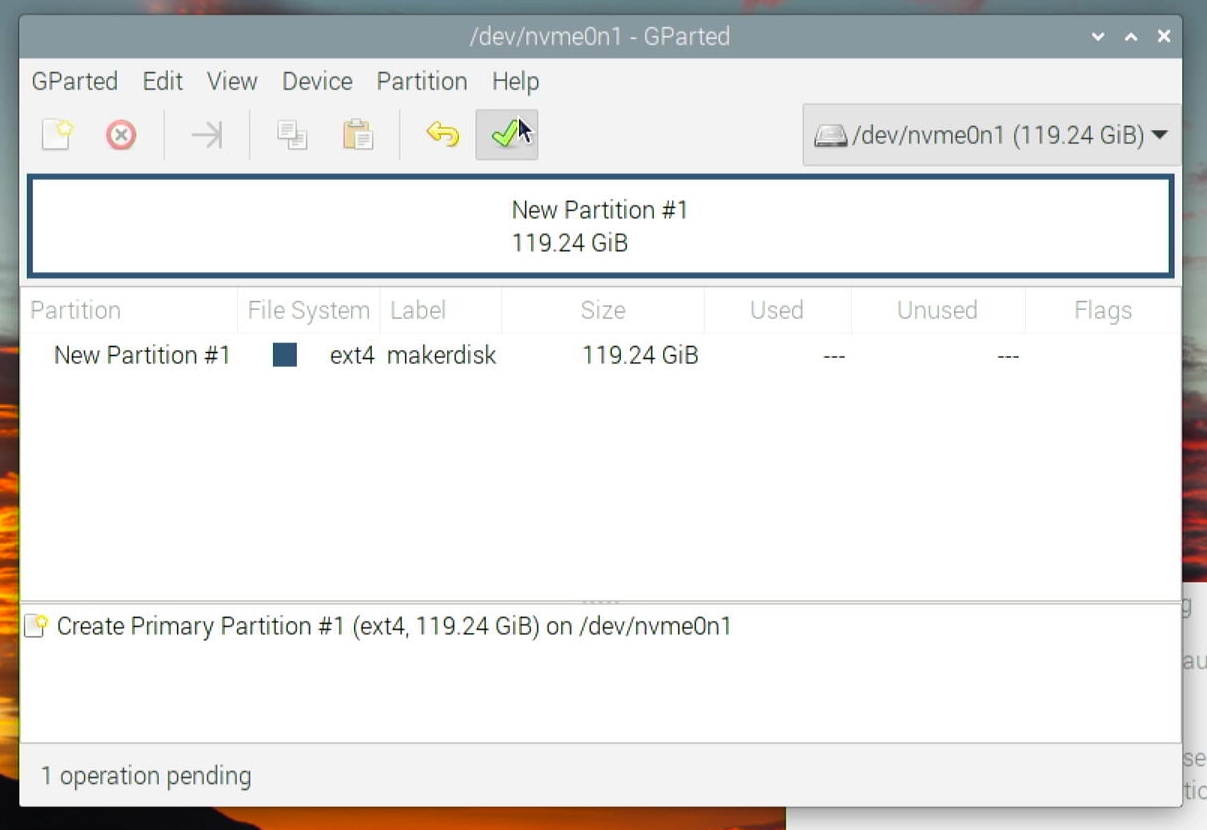
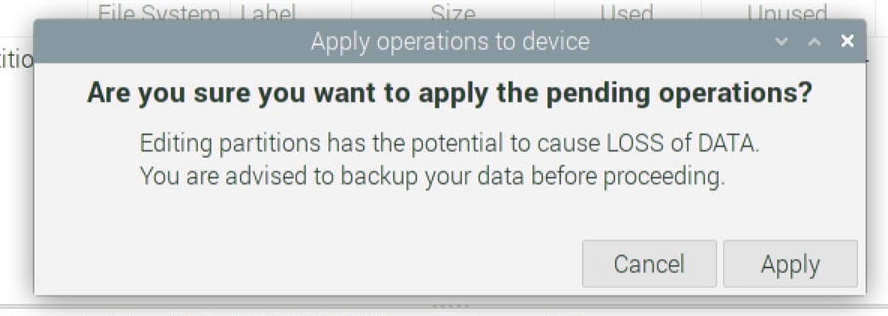
Click Apply
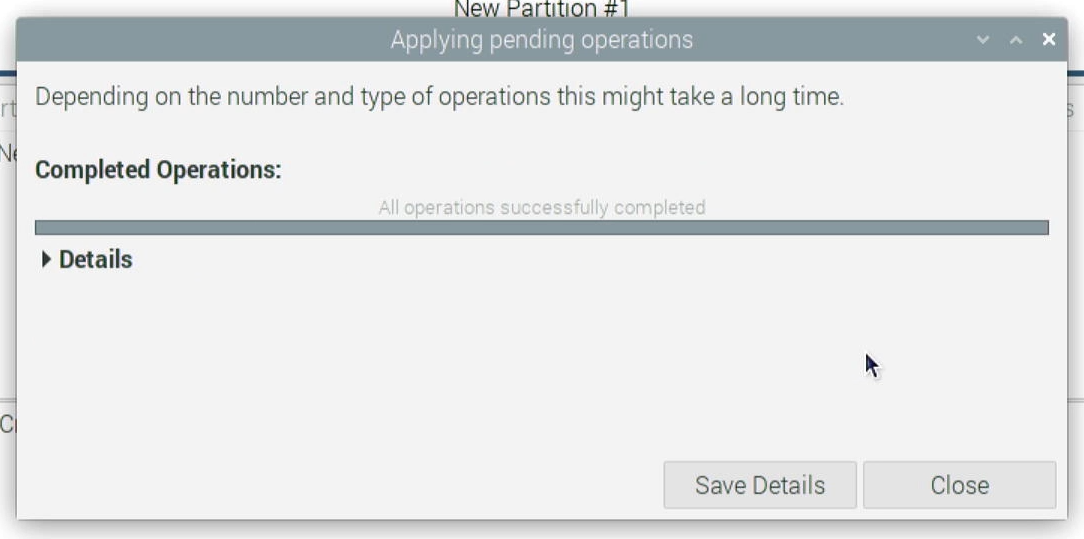
When it reports All operations completed in the Applying pending operations window, click Close
Right-click on the listed partition and click Information
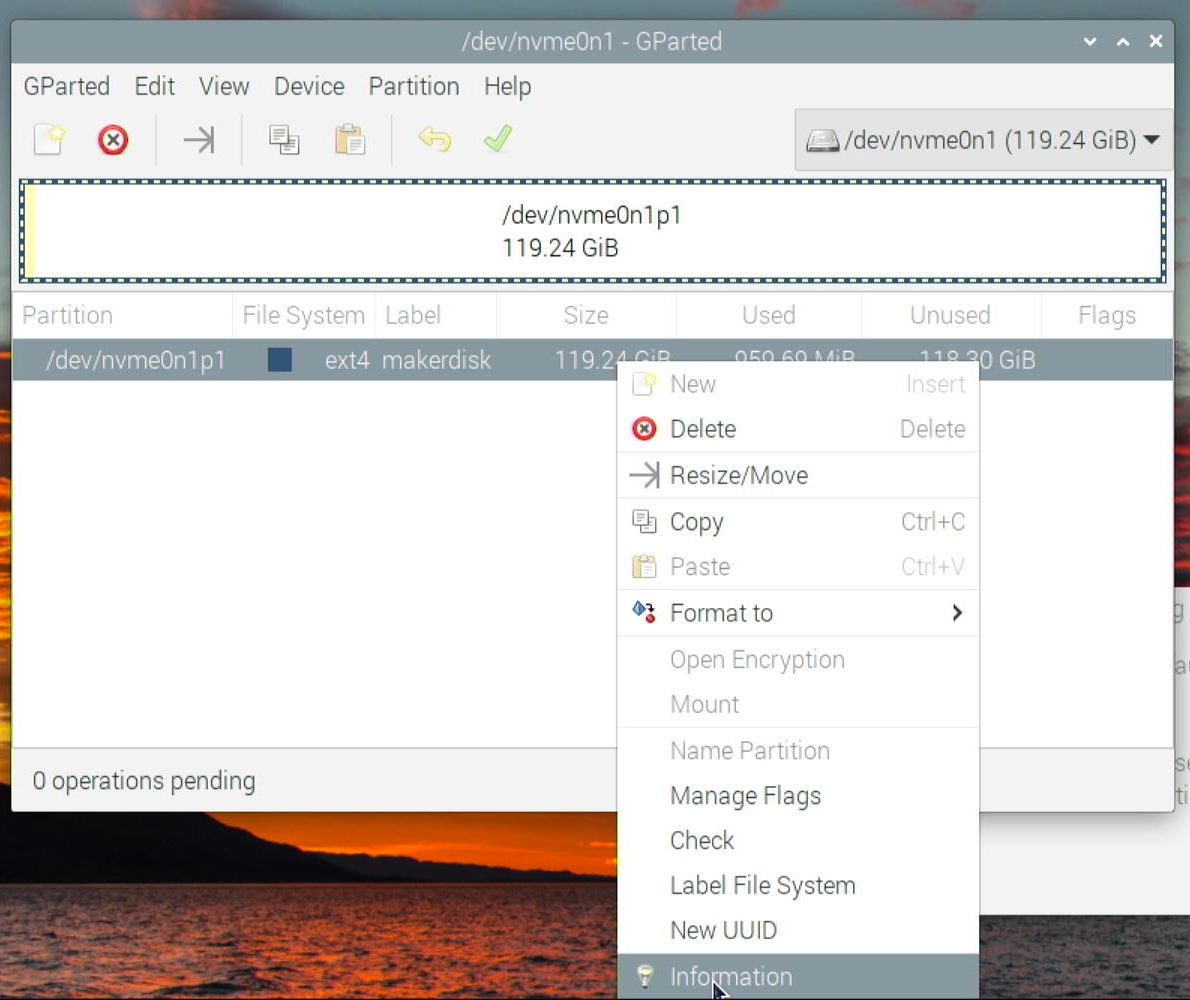
Copy the UUID (universal unique identifier)

Back in the terminal window, we are now going to edit the fstab file from the etc directory. This will make the NVMe drive automatically mount after a start-up or reboot.
sudo nano /etc/fstab
Create a new line at the bottom of the file and type in this command. Replace the UUID with the value you copied from GParted earlier.
UUID=YourUuid /home/pi/makerdisk/ ext4 defaults,auto,users,rw,nofail 0 0
Exit out of editing the fstab file by pressing Ctrl + X. Then press Y to save the file.
Lastly, mount the NVMe drive once
sudo mount -a
You should see on the desktop your NVMe drive shows up as makerdisk
You may now reassemble IRIV. Reassembly is a reverse of the disassembly.
Hardware Components
 Mới
Hết hàng
Mới
Hết hàngIRIV PiControl - Bộ Điều Khiển Công Nghiệp IR4....
8,877,000₫++ 8,070,000₫
x 1 đơn vị