 International
 Singapore
 Malaysia
 Thailand
 Vietnam
Không có sản phẩm trong giỏ hàng!

GETTING STARTED WITH MAKER NANO RP2040 AND ARDUINO IDE
- Hussien Jawhar Sathik
- 08 Feb 2022
- Tutorial
- 1336
Introduction
In this tutorial we shall see how to program the Maker Nano RP2040 using Arduino IDE
Video
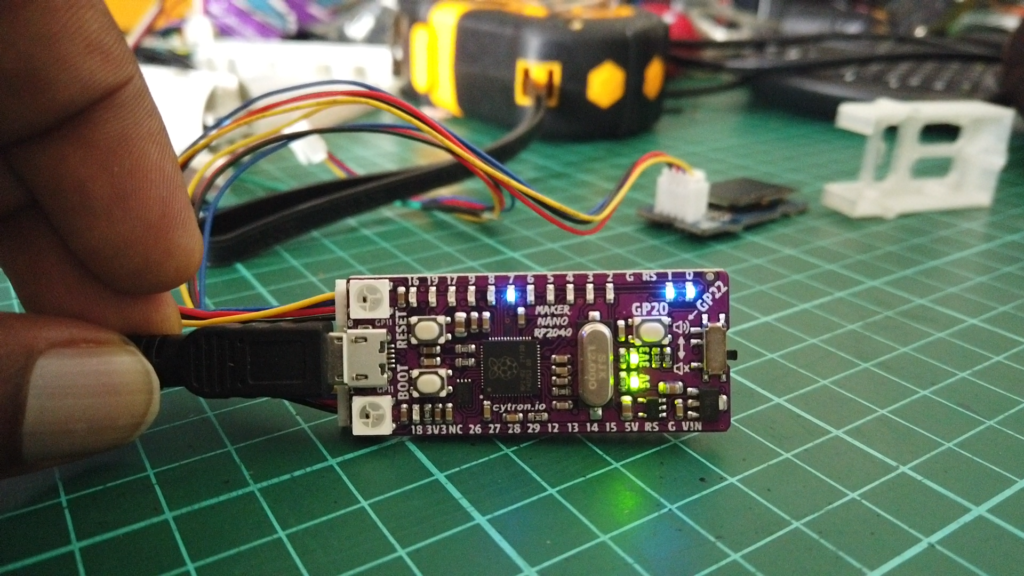
Hardware Preparation
This is the list of items used in the video.
Steps
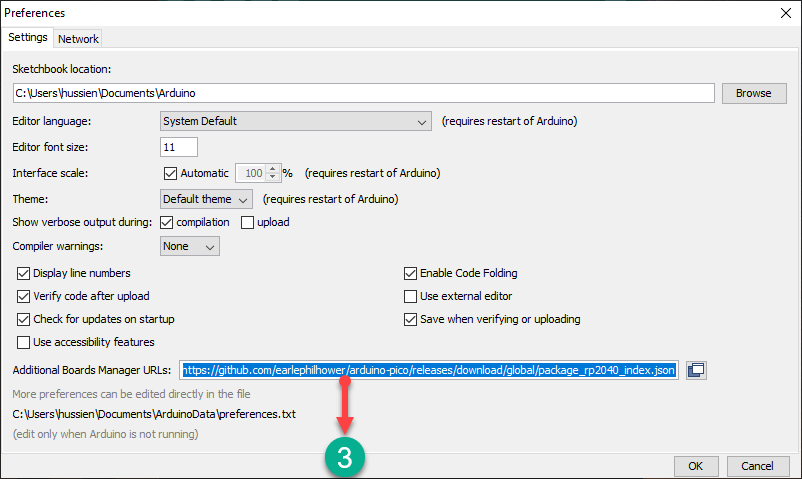
- The first step before we can program the Maker Nano RP2040 using the Arduino IDE is add the board to the IDE environment. To do this, copy the link below and paste it in the Additional Board Manager inside the preferences window.
https://github.com/earlephilhower/arduino-pico/releases/download/global/package_rp2040_index.json
Copy and paste the link above into the additional board manager URLs, as shown in the figure below
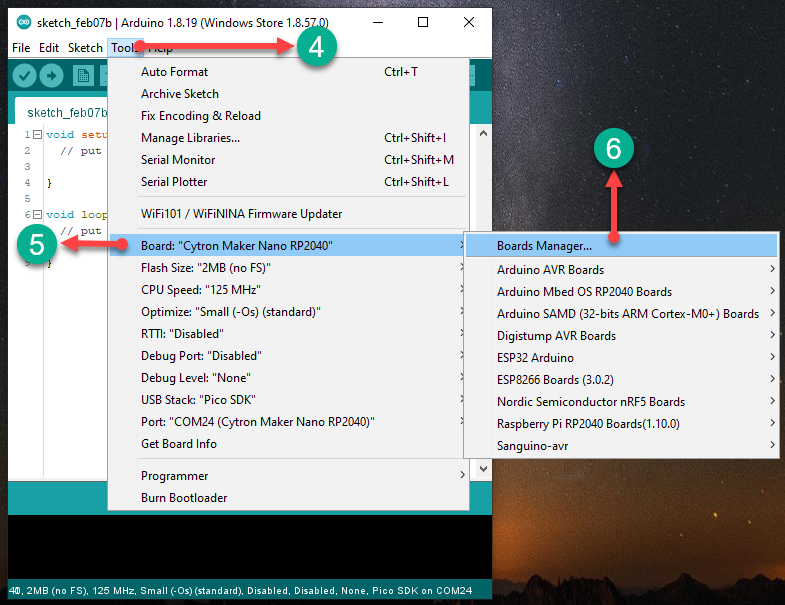
Next, go to the Tools, choose Board and click 'Board Manager
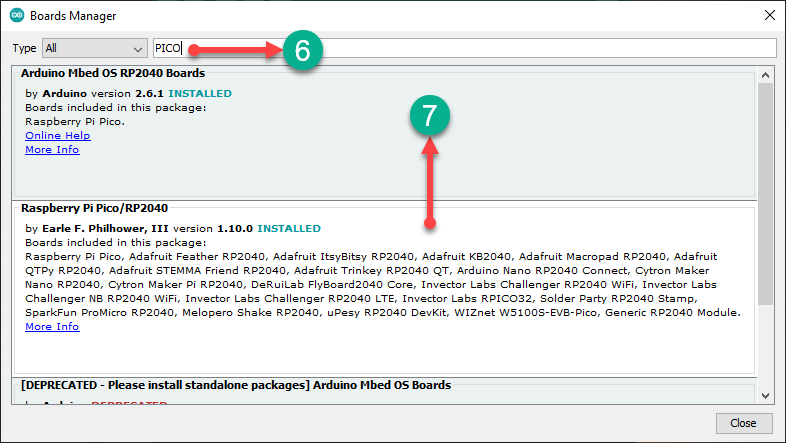
Once the Boards Manager is open, type "PICO" in the search bar and hit enter. And choose the "Raspberry Pi Pico/RP2040. If previously you have installed it, you may choose to update to latest version.

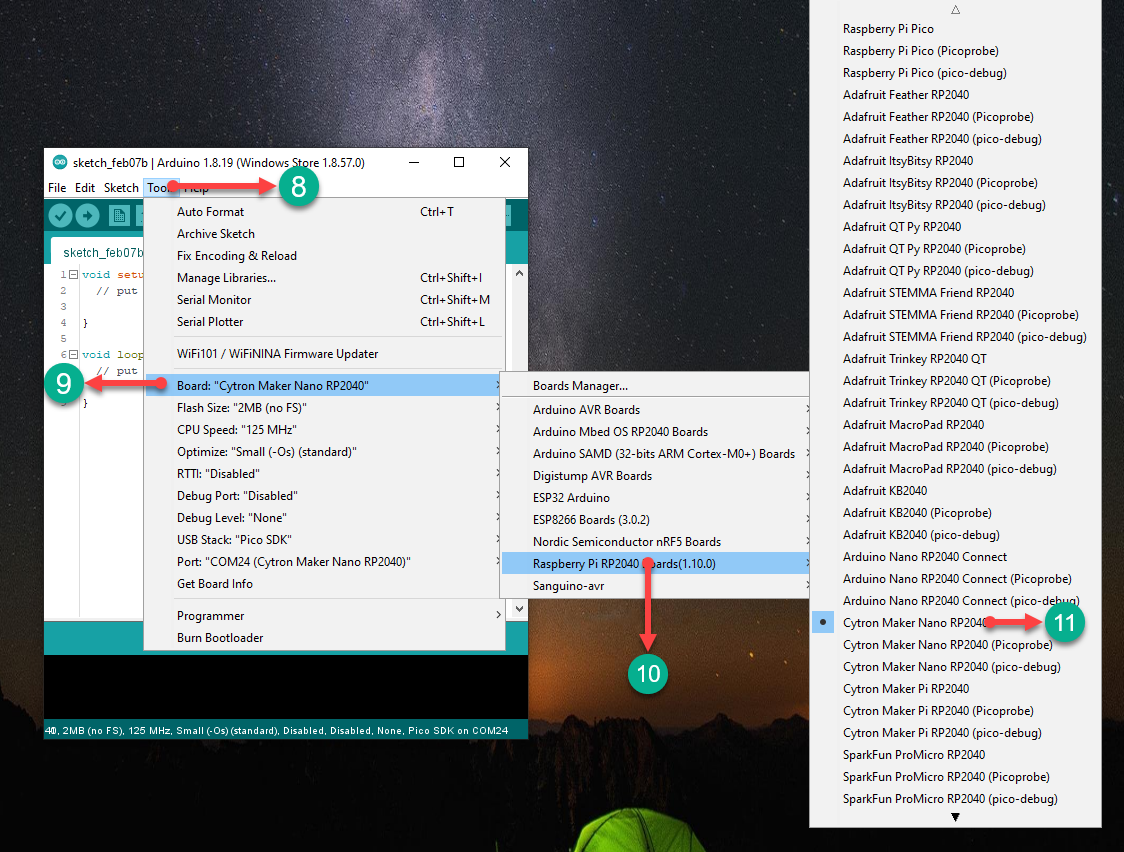
Once the installation is successful, we are ready to program our board. The next step would be to choose the correct board. To do this, go to Tools --> Board --> Raspberry Pi RP2040 Boards and choose "Cytron Maker Nano RP2040"
And the next step is to choose the correct port that the Maker Nano RP2040 is connected to. Refer to figure below
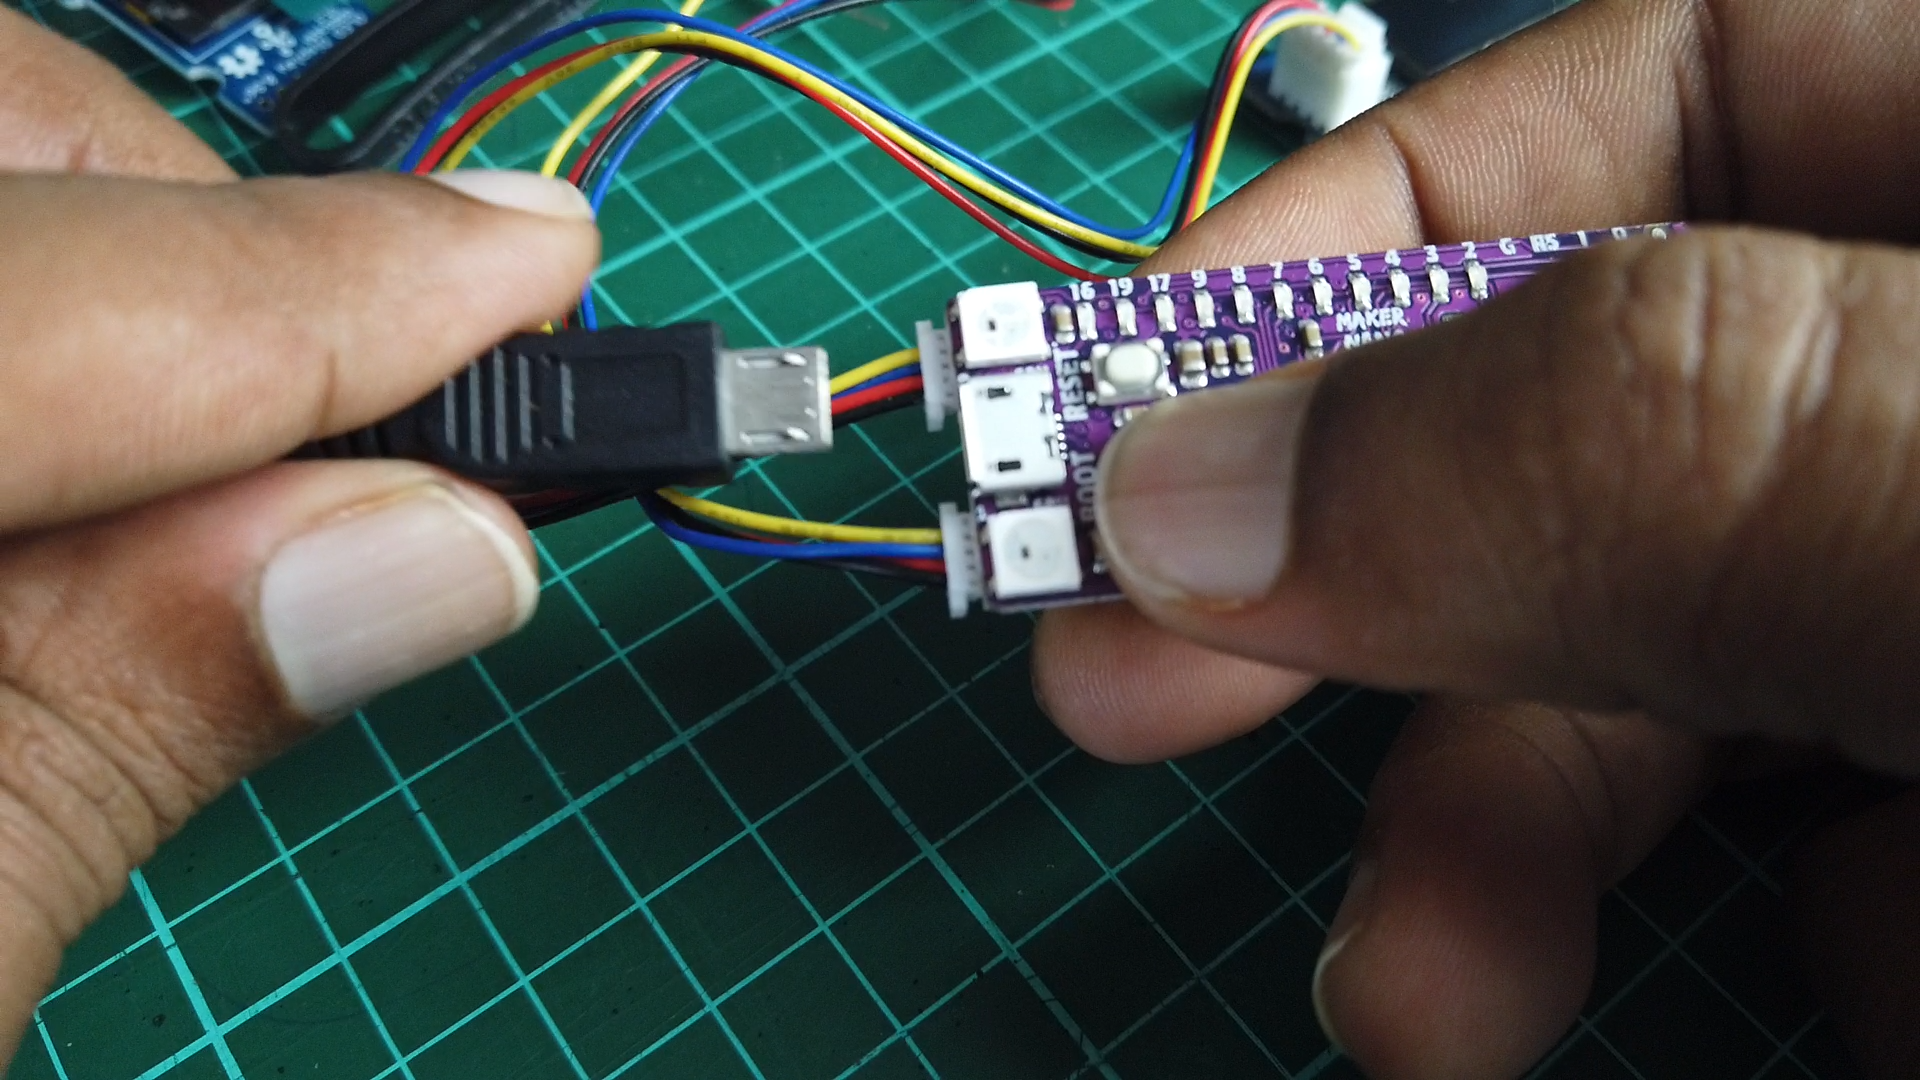
But before connecting the Maker Nano RP2040 for the first time to the PC, need to hold the BOOT button pressed while connecting the USB cable. As shown in the figure below. Once done we can burn or flash our first program into the board.
The first program that we would like to do is the classic blink program. The code for the first program is as shown in the next section.
Code
The code for this tutorial is as shown below
void setup() {
  // put your setup code here, to run once:
pinMode(7,OUTPUT);
}

void loop() {
  // put your main code here, to run repeatedly:
 digitalWrite(7, HIGH);
 delay(500);
 digitalWrite(7, LOW);
 delay(500);
 }
Outcome

Thank You
Thanks for reading this tutorial. If you have any technical inquiries, please post at Cytron Technical Forum.
"Please be reminded, this tutorial is prepared for you to try and learn.
You are encouraged to improve the code for a better application."