 International
 Singapore
 Malaysia
 Thailand
 Vietnam
Không có sản phẩm trong giỏ hàng!

Getting Started with Raspberry Pi 4B-1GB Beginner Set
INTRODUCTION
This tutorial will show you how to get started with the Beginner Set for Raspberry Pi 4B. The Raspberry Pi is a small computer that can do lots of things. This beginner set is the basic set complete with the sensor and camera that you may need in the next project.
In this tutorial, you will connect up a Raspberry Pi computer.
HARDWARE REQUIRED
Included in the kit
- Raspberry Pi 4 Model B - 1GB
- 16GB Micro SD Card with NOOBS for RPI
- Official RPi 15W (5V/3A) PSU USB C UK Plug-Black
Not included
- Monitor
- Micro HDMI to Standard HDMI (A/M) 1m Cable
- A USB keyboard and mouse
- Headphones or speakers (optional)
- An ethernet cable (optional)
SOFTWARE REQUIRED
- Raspbian, installed via NOOBS
Using NOOBS is the easiest way to install Raspbian on your SD card. If you are not having the SD Card with NOOBS, you may follow the instruction to download here.
MEET THE RASPBERRY PI
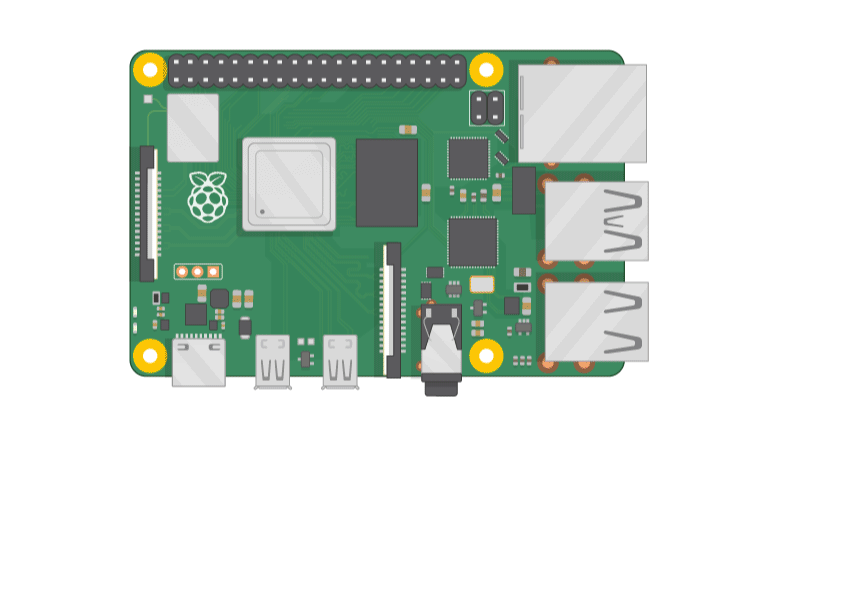
Let’s take a look at the Raspberry Pi. You should have a Raspberry Pi computer in front of you for this. It shouldn’t be connected to anything yet.
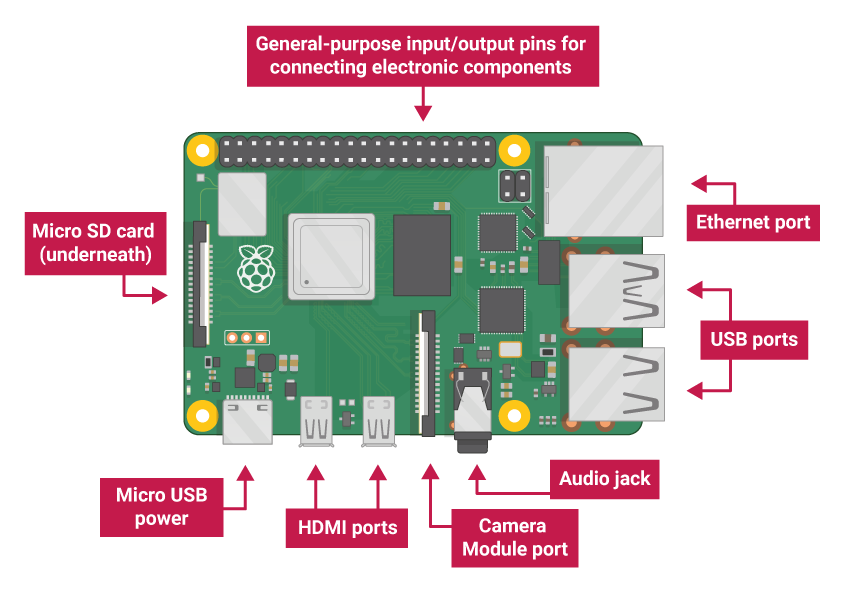
| Micro USB ports | Used to connect a mouse and keyboard. You can also connect other components, such as a USB drive. |
| SD card slot | Slot the SD card in here. This is where the operating system software and your files are stored. |
| Ethernet port | Is used to connect the Raspberry Pi to a network with a cable. The Raspberry Pi can also connect to a network via wireless LAN. |
| Audio jack | Can be used to connect headphones or speakers here. |
| Micro HDMI port | To connect the monitor (or projector) that you are using to display the output from the Raspberry Pi. If your monitor has speakers, you can also use them to hear the sound. |
| Micro USB power connector | This is where you connect a power supply. You should always do this last after you have connected all your other components. |
| GPIO ports | These allow you to connect electronic components such as LEDs and buttons to the Raspberry Pi |
CONNECT YOUR RASPBERRY PI
Now let’s connect up your Raspberry Pi and get it running.
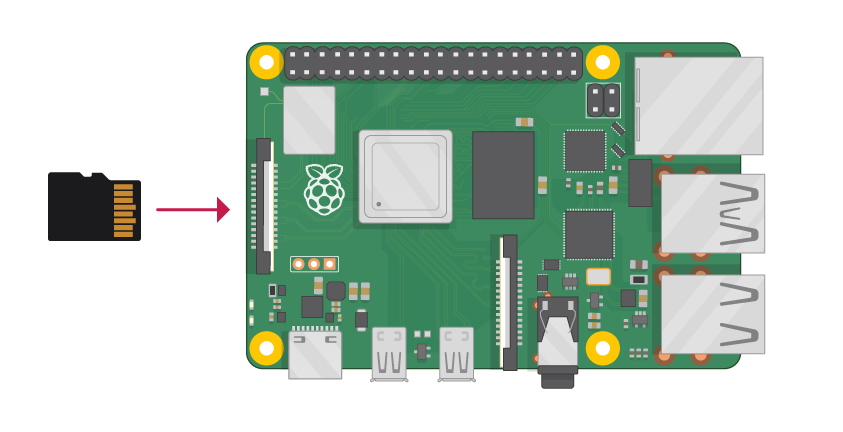
- Insert the SD Card with NOOBS to the SD card slot.
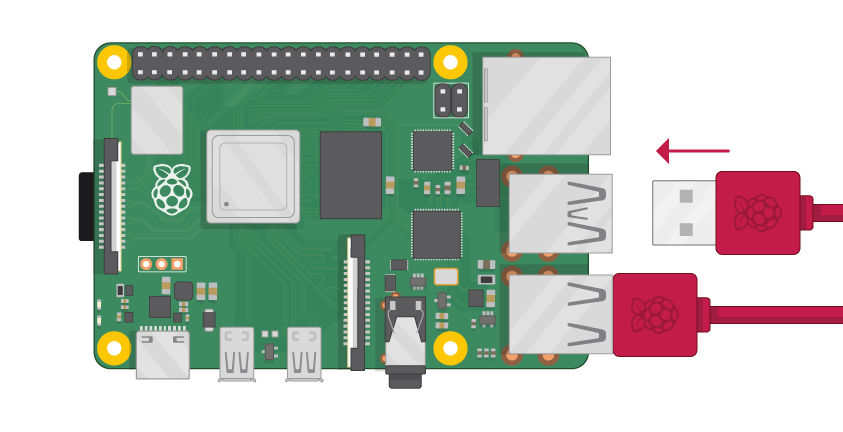
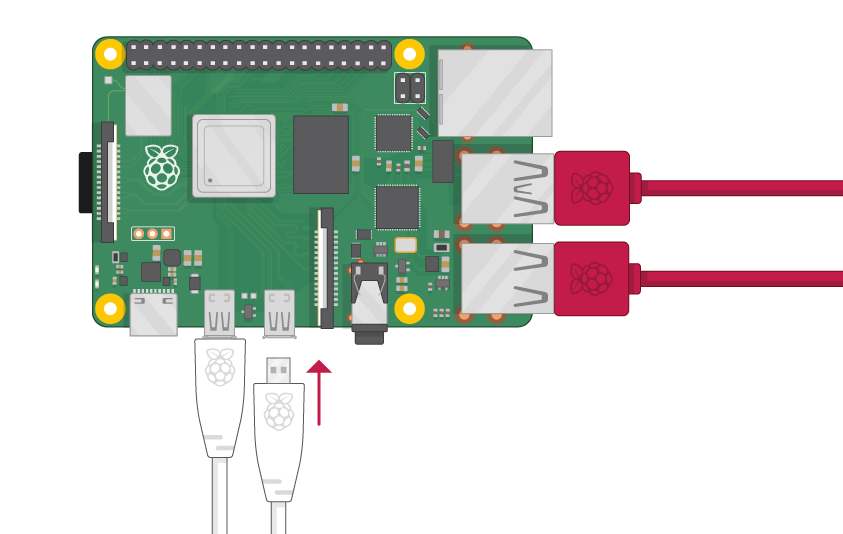
- Find the USB connector for your mouse, and connect the mouse to one of the USB port on the Raspberry Pi (it doesn’t matter which one).
- Connect the keyboard in the same way.
- Make sure your screen is plugged into a wall socket and switched on.
- Look at the HDMI port(s) on your Raspberry Pi — notice that they have a flat side on top.
- Use a cable to connect the screen to the Raspberry Pi’s HDMI port — use an adapter if necessary.
Raspberry Pi 4
Connect your screen to the first of Raspberry Pi 4’s HDMI ports, labelled HDMI0.
You could connect an optional second screen in the same way.
- Connect the monitor cable to the Pi’s HDMI port — use an adapter if necessary. Nothing will display yet.
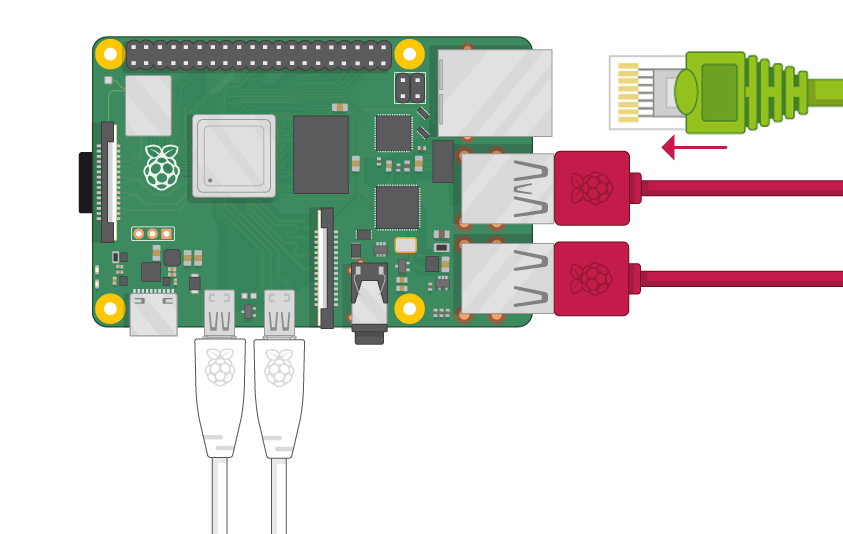
- If you want to connect the Pi to the internet via Ethernet, use an Ethernet cable to connect the Ethernet port on the Raspberry Pi to an Ethernet socket on the wall or on your internet router. You don’t need to do this if you’ll be using WiFi or if you don’t want to connect to the internet.
- The sound will come from your screen if it has speakers or you can connect headphones or speakers to the audio jack if you have them.
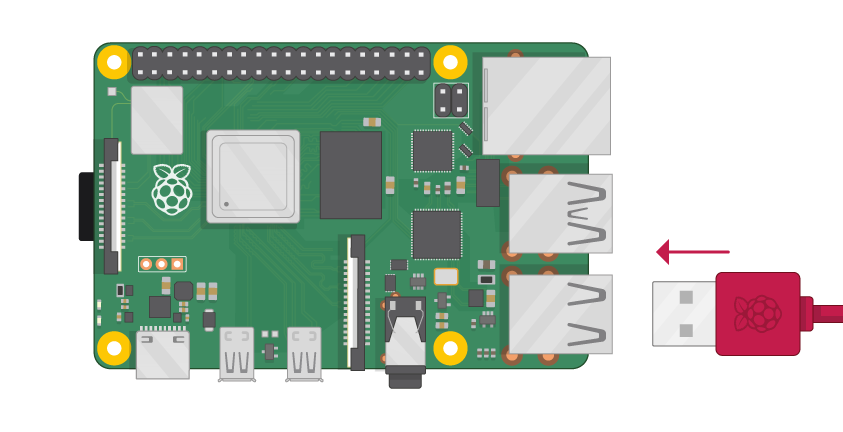
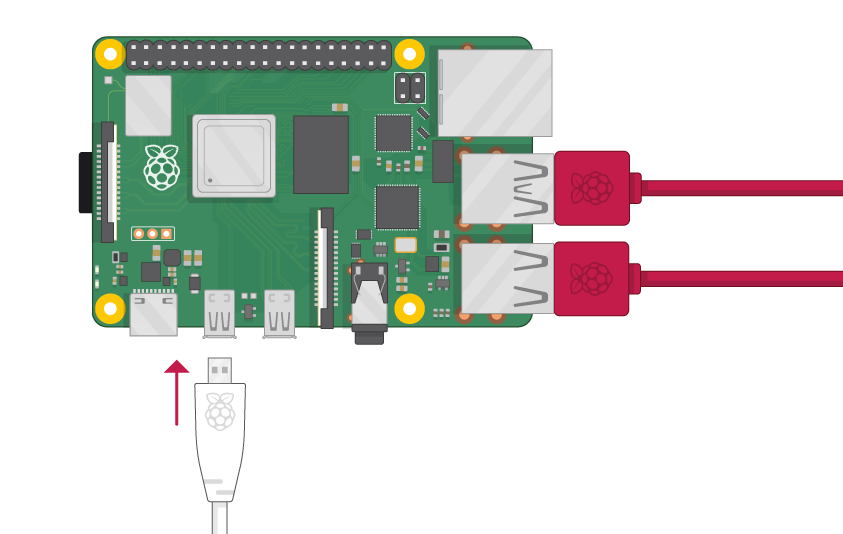
- Plug the power supply into a socket and then connect it to your Raspberry Pi’s USB power port.
- You should see a red light on the Raspberry Pi.
Now we are going to install Raspbian with NOOBS
- On your screen, you will be offered a choice when the installer is loaded. You should check the box for Raspbian, and then click Install.
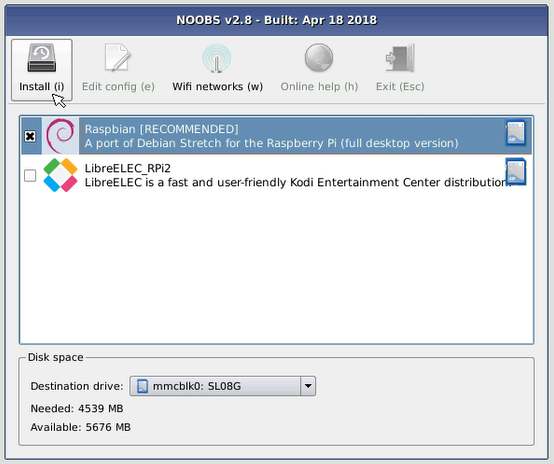
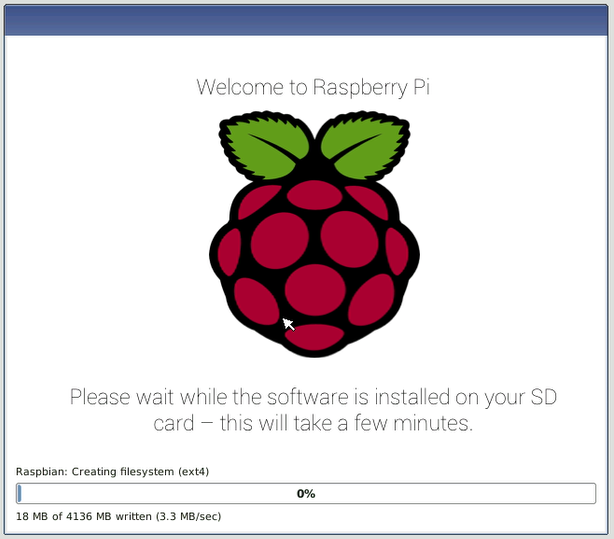
- Click Yes at the warning dialog, and then sit back and relax. It will take a while as the Raspbian install.
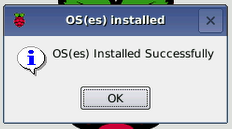
- Once Raspbian has been installed, click OK and your Raspberry Pi will restart and Raspbian will then boot up.
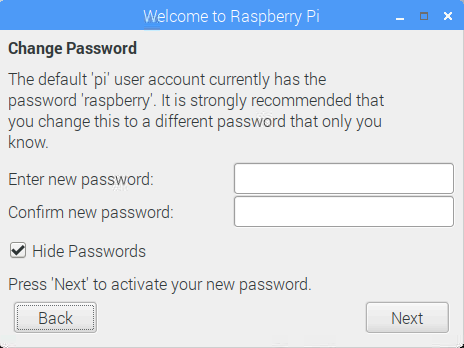
- When you start your Raspberry Pi for the first time, the Welcome to Raspberry Pi application will pop up and guide you through the initial setup.

- Click Next to start the setup.
- Set your Country, Language, and Timezone, then click Next again.

- Enter a new password for your Raspberry Pi and click Next.
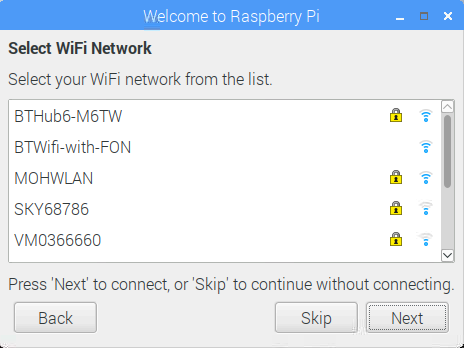
- Connect to your WiFi network by selecting its name, entering the password, and clicking Next
- Click Next let the wizard check for updates to Raspbian and install them (this might take a little while).

- Click Done or Reboot to finish the setup. Note: you will only need to reboot if that’s necessary to complete an update.

- This is the graphical desktop that appears.

VIDEO
References
- Getting started with the Raspberry Pi By raspberrypi.org
- Image from Raspberry Pi