 International
 Singapore
 Malaysia
 Thailand
 Vietnam
Không có sản phẩm trong giỏ hàng!

Build a Traffic Light Project with Pico W and CircuitPython
- Abdulrahman Alhamed
- 02 May 2023
- Tutorial
- Beginner
- 1621
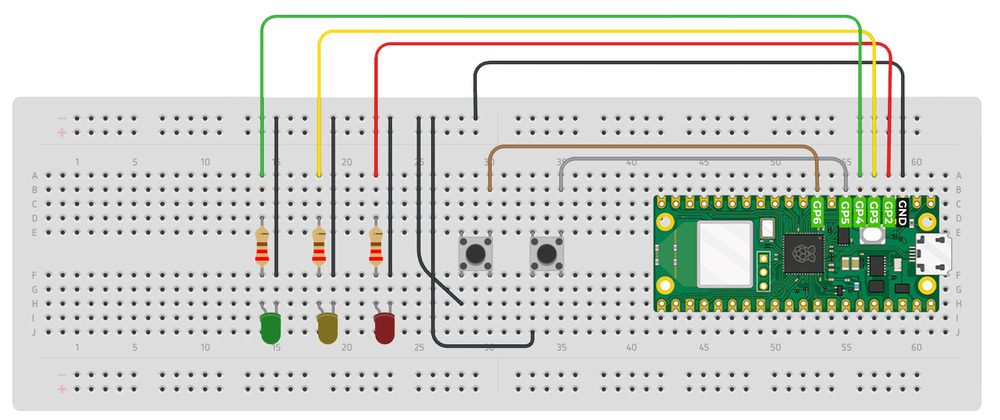
Want to learn how to build a traffic light project using Pico W and CircuitPython? In this tutorial, we'll show you how to create a functional traffic light with just three LEDs and two buttons. You'll learn how to wire the LEDs and buttons, define their pins, and set their direction. We'll also cover how to define traffic light states, use a loop to check button states, and update the traffic light state accordingly.
Video Tutorial
Components Required
- Raspberry Pi Pico W
- 3x LED lights (red, yellow, and green)
- 3x 220 ohm resistors
- 2x push buttons
- Breadboard
- Male to Male Jumper Wire
- USB cable
Connection
Get Familiar with Thonny and CircuitPython
In this tutorial, we'll use Thonny editor to build the code for our traffic light project. If you're not familiar with Thonny, check out the video below to learn how to get started with it.
Code
Project complete
When the change button is pressed, the traffic light switches from displaying the red light to showing the green light. On the other hand, if the reset button is pressed, the yellow light is activated for a period of three seconds before the traffic light returns to displaying the red light.
Related Posts
